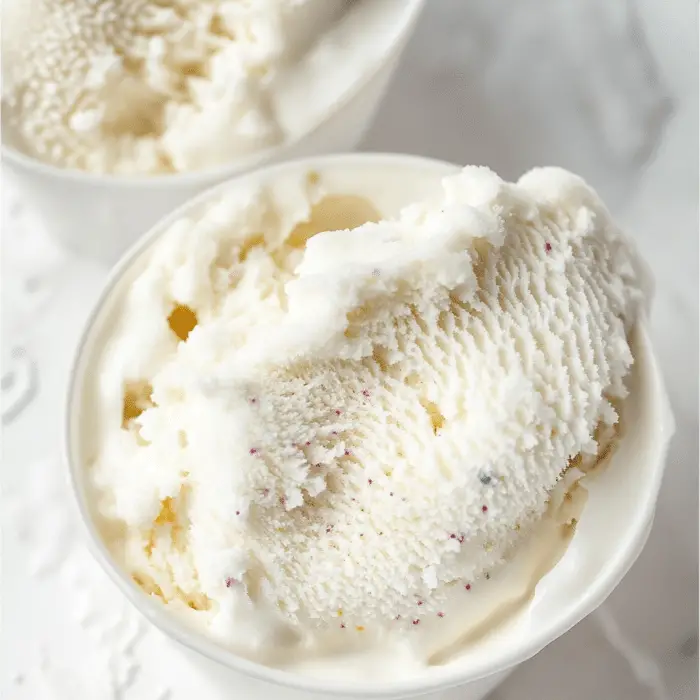
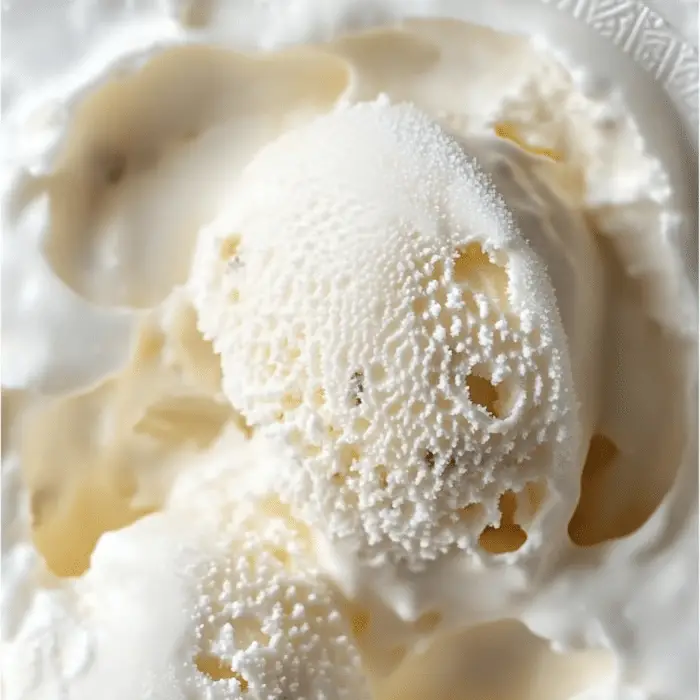
Snow days call for cozy fun, and what better way to celebrate than with a homemade Snow Ice Cream recipe? This delightful winter dessert is a nostalgic treat that transforms freshly fallen snow into a creamy, sweet indulgence. Ready in just 5 minutes with simple pantry ingredients, it’s a perfect activity to share with family and friends. Whether you’re adding sprinkles for a pop of color or enjoying it plain, this recipe is bound to become a winter favorite.

Ingredients
To whip up this quick and easy treat, gather the following ingredients:
- 1 cup milk
- ½ cup granulated sugar
- 1 teaspoon vanilla extract
- A pinch of salt
- 8–10 cups fresh, clean snow
- Sprinkles (optional)
Instructions
- Prepare the Base Mixture:
In a medium-sized bowl, whisk together the milk, granulated sugar, vanilla extract, and a pinch of salt. Stir until the sugar completely dissolves, creating a smooth, sweet base. - Mix in the Snow:
Pour the liquid mixture over 8 cups of fresh, clean snow. Gently fold the ingredients together until well combined. If the texture is too runny, add up to 2 more cups of snow until the desired consistency is achieved. - Serve and Enjoy:
Scoop the Snow Ice Cream into bowls, top with sprinkles if desired, and serve immediately. This creamy, frosty treat is best enjoyed fresh!
Tips for the Best Snow Ice Cream
- Use Clean Snow: Always collect snow from a clean, undisturbed area for safety and the best taste.
- Chill Your Ingredients: Cold milk will help keep the ice cream from melting too quickly as you mix.
- Experiment with Flavors: Swap vanilla extract for almond, peppermint, or other flavorings to customize your treat.
- Add Toppings: Sprinkles, chocolate syrup, or crushed candies make excellent additions for extra flair.
Why You’ll Love This Recipe
- Quick and Simple: With just a few ingredients and no special equipment, this recipe comes together in minutes.
- Fun for All Ages: Kids and adults alike will enjoy the magic of turning snow into ice cream.
- Customizable: Add your favorite toppings or flavorings to make it uniquely yours.

Serving and Storage Tips
Serving Tips
- Serve Immediately: Snow Ice Cream is best enjoyed fresh, right after it’s made. The frosty texture melts quickly, so scoop it into bowls and enjoy without delay.
- Pair with Toppings: Elevate your dessert with fun toppings like sprinkles, crushed candies, mini marshmallows, or a drizzle of chocolate or caramel sauce.
- Make It a Sundae: Turn your Snow Ice Cream into a full sundae by adding whipped cream, a cherry, and nuts for a decadent winter treat.
Storage Tips
- Short-Term Storage: If you need to store it briefly, place the ice cream in an airtight container and keep it in the freezer. Note that the texture may harden over time, so it’s best consumed within 1–2 hours.
- Re-Softening Tip: If the ice cream becomes too firm in the freezer, let it sit at room temperature for a few minutes before serving, or gently stir in a splash of milk to restore creaminess.
- Avoid Long Storage: Snow Ice Cream is delicate and loses its creamy texture if stored for too long. It’s meant to be a quick, fresh treat rather than a long-term dessert option.
By following these tips, you’ll ensure that every bite of your Snow Ice Cream is as delightful as the first!
Variations
Snow Ice Cream is incredibly versatile, allowing you to customize the flavor and toppings to suit your taste. Here are some fun and creative variations to try:
1. Chocolate Snow Ice Cream
- Replace the vanilla extract with 2 tablespoons of cocoa powder.
- Stir in a handful of mini chocolate chips for extra chocolatey goodness.
- Top with chocolate syrup or shaved chocolate for a decadent treat.
2. Strawberry Snow Ice Cream
- Substitute vanilla extract with 1 teaspoon of strawberry extract.
- Add a few drops of red or pink food coloring to give it a lovely hue.
- Garnish with fresh strawberry slices or strawberry sauce.
3. Peppermint Snow Ice Cream
- Swap the vanilla extract for ½ teaspoon of peppermint extract.
- Sprinkle crushed candy canes or peppermint candies on top.
- Add a few drops of green or red food coloring for a festive touch.
4. Fruity Snow Ice Cream
- Blend your favorite fruit, like bananas, blueberries, or mango, into the milk mixture.
- Combine the fruit-infused base with the snow for a naturally sweet and colorful variation.
- Top with additional fruit for a fresh finish.
5. Coffee Snow Ice Cream
- Mix 1 teaspoon of instant coffee or espresso powder into the milk mixture.
- For a creamy mocha flavor, add 1 tablespoon of cocoa powder.
- Sprinkle crushed coffee beans or drizzle caramel sauce on top.
6. Tropical Snow Ice Cream
- Replace milk with coconut milk and vanilla extract with coconut or pineapple extract.
- Add a handful of shredded coconut or diced tropical fruits like pineapple and mango.
- Garnish with a cherry or a sprinkle of toasted coconut.
7. Birthday Cake Snow Ice Cream
- Use vanilla extract and stir in 2 tablespoons of cake mix (vanilla or funfetti flavor).
- Mix in colorful sprinkles for a festive look.
- Top with whipped cream and extra sprinkles for a birthday-worthy dessert.
FAQs
1. Can I use any type of snow for Snow Ice Cream?
It’s important to use fresh, clean snow that hasn’t been exposed to dirt, debris, or contaminants. Avoid snow that has been on the ground for too long or collected from areas near roads or sidewalks.
2. What can I use if I don’t have fresh snow?
If you don’t have access to clean snow, you can use finely crushed ice or shaved ice as a substitute. The texture won’t be identical but will still create a tasty treat.
3. Can I make Snow Ice Cream vegan or dairy-free?
Yes! Use plant-based milk like almond, oat, or coconut milk instead of dairy milk. Make sure to use vegan-friendly toppings and sweeteners as well.
4. How do I prevent the Snow Ice Cream from melting quickly?
To slow melting, use cold ingredients straight from the fridge, mix the ice cream in a chilled bowl, and serve immediately. Avoid leaving it out at room temperature for too long.
5. Can I store leftovers for later?
Snow Ice Cream is best enjoyed fresh, but you can store it in an airtight container in the freezer for up to 1–2 hours. Keep in mind that the texture may harden, and it might lose some of its creaminess.
6. Can I adjust the sweetness level?
Absolutely! Adjust the amount of sugar to suit your taste. You can also experiment with alternative sweeteners like honey, maple syrup, or stevia.
7. Is Snow Ice Cream safe for kids to eat?
Yes, as long as you use clean snow from a safe, uncontaminated source. Always supervise children when collecting snow to ensure its cleanliness.
8. Can I make Snow Ice Cream in advance for a party?
It’s not ideal to make Snow Ice Cream too far in advance, as it loses its fluffy texture over time. Instead, prepare the liquid base ahead of time, store it in the fridge, and mix it with snow just before serving.
9. Can I double or halve the recipe?
Yes, this recipe is easily scalable. Simply adjust the ingredient amounts to suit the number of servings you need.
10. What are some unique toppings I can use?
Get creative with toppings! Crushed cookies, gummy bears, granola, flavored syrups, or even a dusting of cinnamon or cocoa powder can take your Snow Ice Cream to the next level.
Snow Ice Cream is the perfect way to make the most of a snowy day. This quick and easy recipe combines the joy of winter with the indulgence of a sweet treat, offering a memorable experience for all. Gather your family, grab a bowl of fresh snow, and whip up this delightful dessert. Whether it’s your first time trying it or a beloved tradition, Snow Ice Cream is sure to bring smiles and sweet memories to your home.
Print
Snow Ice Cream
Description
Snow days call for cozy fun, and what better way to celebrate than with a homemade Snow Ice Cream recipe? This delightful winter dessert is a nostalgic treat that transforms freshly fallen snow into a creamy, sweet indulgence. Ready in just 5 minutes with simple pantry ingredients, it’s a perfect activity to share with family and friends. Whether you’re adding sprinkles for a pop of color or enjoying it plain, this recipe is bound to become a winter favorite.
Ingredients
- 1 cup milk
- ½ cup granulated sugar
- 1 teaspoon vanilla extract
- A pinch of salt
- 8–10 cups fresh, clean snow
- Sprinkles (optional)
Instructions
- Prepare the Base Mixture:
In a medium-sized bowl, whisk together the milk, granulated sugar, vanilla extract, and a pinch of salt. Stir until the sugar completely dissolves, creating a smooth, sweet base. - Mix in the Snow:
Pour the liquid mixture over 8 cups of fresh, clean snow. Gently fold the ingredients together until well combined. If the texture is too runny, add up to 2 more cups of snow until the desired consistency is achieved. - Serve and Enjoy:
Scoop the Snow Ice Cream into bowls, top with sprinkles if desired, and serve immediately. This creamy, frosty treat is best enjoyed fresh!
Notes
Serving Tips
- Serve Immediately: Snow Ice Cream is best enjoyed fresh, right after it’s made. The frosty texture melts quickly, so scoop it into bowls and enjoy without delay.
- Pair with Toppings: Elevate your dessert with fun toppings like sprinkles, crushed candies, mini marshmallows, or a drizzle of chocolate or caramel sauce.
- Make It a Sundae: Turn your Snow Ice Cream into a full sundae by adding whipped cream, a cherry, and nuts for a decadent winter treat.
Storage Tips
- Short-Term Storage: If you need to store it briefly, place the ice cream in an airtight container and keep it in the freezer. Note that the texture may harden over time, so it’s best consumed within 1–2 hours.
- Re-Softening Tip: If the ice cream becomes too firm in the freezer, let it sit at room temperature for a few minutes before serving, or gently stir in a splash of milk to restore creaminess.
- Avoid Long Storage: Snow Ice Cream is delicate and loses its creamy texture if stored for too long. It’s meant to be a quick, fresh treat rather than a long-term dessert option.
