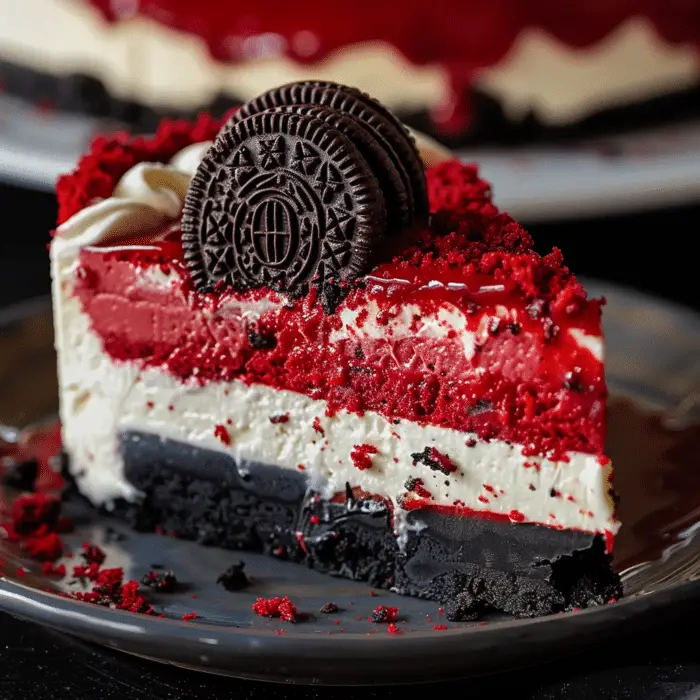
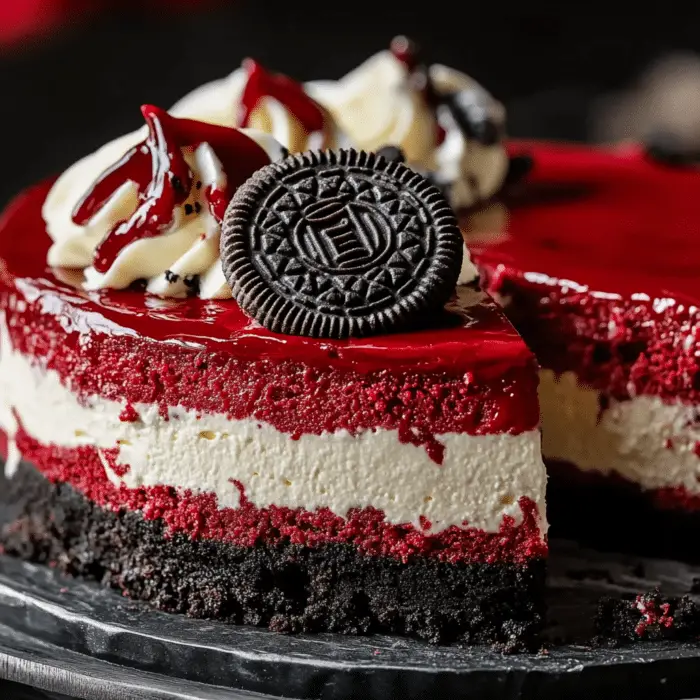
Indulge in the ultimate dessert experience with this Red Velvet Oreo Cheesecake. Combining the richness of cheesecake with the irresistible flavors of red velvet and Oreos, this luxurious treat is a must-try for any dessert lover. Whether you’re planning a special celebration or simply want to treat yourself, this vibrant and indulgent dessert will be the star of the show.

Ingredients
To create the perfect base for your cheesecake, you’ll need a few simple ingredients that will give the dessert its signature crunch:
- 2 cups Oreo crumbs
- 1/2 cup unsalted butter, melted
for the Cheesecake:
The filling is where the magic happens. This creamy mixture, with its blend of red velvet and Oreo flavors, is sure to satisfy even the most discerning sweet tooth:
- 3 (8 oz) packages cream cheese, softened
- 1 cup granulated sugar
- 3 large eggs
- 1/4 cup sour cream
- 2 tsp vanilla extract
- 2 tbsp cocoa powder
- 1 tbsp red food coloring
- 1 cup crushed Oreos
for the Topping:
To finish off your cheesecake and give it an extra touch of flair, you’ll need a few garnishes:
- Whipped cream
- Whole Oreos
- Red velvet crumbs
Directions
- Prepare the Crust: Preheat your oven to 350°F (175°C). In a medium bowl, mix the Oreo crumbs with melted butter. Press the mixture firmly into the bottom of a springform pan to create an even layer. Chill the crust while you prepare the cheesecake filling.
- Make the Cheesecake Filling: Beat the softened cream cheese and sugar in a large mixing bowl until smooth. Add the eggs one at a time, mixing well after each addition. Stir in the sour cream, vanilla extract, cocoa powder, and red food coloring, ensuring everything is well combined.
- Add the Crushed Oreos: Gently fold the crushed Oreos into the cheesecake mixture. Pour the mixture over the chilled crust, smoothing the top with a spatula.
- Bake the Cheesecake: Bake for 55-60 minutes, or until the cheesecake is set but slightly wobbly in the center. Once done, allow the cheesecake to cool completely at room temperature. Then, refrigerate it for at least 4 hours to set properly.
- Decorate and Serve: Once the cheesecake is fully chilled, it’s time to decorate! Top with whipped cream, whole Oreos, and red velvet crumbs for a beautiful and indulgent finishing touch.
Preparation and Cooking Time
- Prep Time: 20 minutes
- Cook Time: 60 minutes
- Total Time: 1 hour 20 minutes (plus 4 hours for chilling)
Calories:
- Approximately 560 calories per slice

Serving and Storage Tips
Serving Tips:
- Chill Before Serving: For the best texture and flavor, ensure that your Red Velvet Oreo Cheesecake is well-chilled. Allow it to set in the refrigerator for at least 4 hours (or overnight) before serving. This helps the flavors meld together and gives the cheesecake the perfect creamy consistency.
- Slice with Warm Knife: To get smooth, clean slices, dip a knife in warm water before cutting. Wipe the knife between each slice to maintain neat edges and keep your presentation looking beautiful.
- Pair with Fresh Berries: For an extra pop of color and flavor, serve your cheesecake with fresh berries like raspberries or strawberries. Their slight tartness complements the rich sweetness of the cheesecake.
- Add Extra Toppings: If you want to elevate the dessert, top it with additional whipped cream, crushed Oreos, or even a drizzle of chocolate syrup to make it even more decadent.
Storage Tips:
- Refrigerate Leftovers: Keep any leftover cheesecake tightly wrapped in plastic wrap or placed in an airtight container. Store it in the refrigerator for up to 5 days.
- Freezing for Later: If you want to enjoy this cheesecake later, you can freeze it. Wrap individual slices or the entire cheesecake in plastic wrap and then foil. Place it in an airtight container or freezer-safe bag. It can be frozen for up to 1-2 months. Thaw in the refrigerator overnight before serving.
- Keep the Toppings Separate: If you plan to store leftovers, consider keeping the whipped cream and decorative toppings separate. Add them just before serving to maintain their freshness and appearance.
With these simple serving and storage tips, you can ensure that your Red Velvet Oreo Cheesecake stays delicious for days, making it a treat to enjoy whenever the craving strikes!
Variations
If you’re looking to customize your Red Velvet Oreo Cheesecake, here are some fun variations to try that will add new twists while maintaining the rich and indulgent flavors:
- Chocolate Chip Red Velvet Cheesecake: Add 1/2 cup of mini chocolate chips to the cheesecake mixture before baking for an extra burst of chocolate flavor. The tiny chocolate bits will melt into the creamy filling, giving it an even richer taste.
- White Chocolate Red Velvet Cheesecake: Swap the crushed Oreos in the filling for white chocolate chips or chunks. This variation brings out a sweeter, creamier flavor, and pairs beautifully with the rich red velvet.
- Red Velvet Oreo Cheesecake Bars: If you prefer smaller servings, turn the cheesecake into bars! Use a square or rectangular pan and press the crust firmly before adding the filling. Bake for about 45-50 minutes, and slice into squares once fully chilled. These are perfect for parties and easier to serve!
- Red Velvet Cheesecake with Oreo Crust and Filling: Take the Oreo theme to the next level by mixing crushed Oreos directly into the crust and filling. This gives the cheesecake a more pronounced Oreo flavor and a slightly firmer texture.
- Peanut Butter Oreo Red Velvet Cheesecake: For peanut butter lovers, swirl 1/2 cup of creamy peanut butter into the cheesecake filling before baking. This adds a nutty, savory flavor that balances the sweetness of the red velvet and Oreos perfectly.
- Mini Red Velvet Oreo Cheesecakes: Make individual servings by using a muffin tin. Line the cups with cupcake liners, press the crust into each one, then fill with the cheesecake mixture. Bake for about 20-25 minutes, and decorate with whipped cream and mini Oreo pieces for a cute presentation.
- Caramel Drizzle Red Velvet Cheesecake: After decorating with whipped cream and whole Oreos, drizzle warm caramel sauce over the top for an added layer of sweetness. The caramel complements the red velvet and Oreo flavors, making each bite extra special.
- Red Velvet Oreo Cheesecake with Nuts: Add a crunchy contrast to the creamy filling by folding in 1/4 cup of chopped pecans or walnuts into the cheesecake mixture. The nuts provide a delicious crunch and nutty flavor that pairs beautifully with the other ingredients.
FAQs
- Can I make this Red Velvet Oreo Cheesecake in advance? Yes! This cheesecake is perfect for making ahead. In fact, it’s best when allowed to chill in the refrigerator for at least 4 hours, or even overnight. This allows the flavors to develop and the texture to set perfectly.
- Can I use a different type of crust for the cheesecake? Absolutely! While the Oreo crust is classic, you can substitute it with a graham cracker crust, chocolate cookie crust, or even a pecan crust for a different flavor and texture. Just be sure to press the crust firmly into the pan before adding the filling.
- What if I don’t have a springform pan? If you don’t have a springform pan, you can use a regular round cake pan, but make sure to line the bottom with parchment paper to help with removal. Alternatively, you can make cheesecake bars using a square or rectangular baking dish.
- Can I make this cheesecake without red food coloring? Yes! If you prefer to avoid food coloring, you can omit it. While it won’t have the signature red hue, the cheesecake will still taste just as delicious with its rich red velvet flavor.
- How long should I bake the cheesecake? Bake the cheesecake at 350°F (175°C) for 55-60 minutes. It should be set with a slight wobble in the center when done. If the edges start to brown, cover the pan with foil to prevent over-baking.
- Can I freeze this Red Velvet Oreo Cheesecake? Yes, this cheesecake freezes wonderfully! Wrap the cheesecake (or individual slices) tightly in plastic wrap, followed by aluminum foil, and freeze for up to 1-2 months. Let it thaw in the refrigerator overnight before serving.
- How do I know when the cheesecake is done baking? The cheesecake is done when it is mostly set with a slight wobble in the center. If you insert a toothpick or knife, it should come out mostly clean, though a few crumbs may remain. It will continue to set as it cools.
- Can I substitute light cream cheese or reduced-fat ingredients? While you can substitute light cream cheese or reduced-fat versions, keep in mind that this may affect the texture and richness of the cheesecake. The cheesecake might not be as creamy or dense as using full-fat cream cheese.
- What can I use instead of sour cream in the cheesecake? If you don’t have sour cream, you can substitute with plain Greek yogurt, which offers a similar tangy flavor and creamy texture. However, it may alter the flavor slightly.
- Can I decorate the cheesecake with other toppings? Yes! While whipped cream, whole Oreos, and red velvet crumbs are traditional, you can get creative with your toppings. Try adding chocolate shavings, fresh berries, or even a drizzle of caramel or chocolate sauce for a unique touch.
The Red Velvet Oreo Cheesecake is a decadent dessert that blends the richness of cheesecake with the irresistible flavors of red velvet and Oreo cookies. Its vibrant red hue makes it as visually stunning as it is delicious, making it the perfect centerpiece for any celebration. Whether you’re hosting a party or treating yourself to a sweet indulgence, this cheesecake is sure to impress. With its creamy filling, crunchy Oreo crust, and luxurious toppings, it’s the perfect way to end any meal on a high note!
Print
Red Velvet Oreo Cheesecak
Description
Indulge in the ultimate dessert experience with this Red Velvet Oreo Cheesecake. Combining the richness of cheesecake with the irresistible flavors of red velvet and Oreos, this luxurious treat is a must-try for any dessert lover. Whether you’re planning a special celebration or simply want to treat yourself, this vibrant and indulgent dessert will be the star of the show.
Ingredients
To create the perfect base for your cheesecake, you’ll need a few simple ingredients that will give the dessert its signature crunch:
- 2 cups Oreo crumbs
- 1/2 cup unsalted butter, melted
Ingredients for the Cheesecake:
The filling is where the magic happens. This creamy mixture, with its blend of red velvet and Oreo flavors, is sure to satisfy even the most discerning sweet tooth:
- 3 (8 oz) packages cream cheese, softened
- 1 cup granulated sugar
- 3 large eggs
- 1/4 cup sour cream
- 2 tsp vanilla extract
- 2 tbsp cocoa powder
- 1 tbsp red food coloring
- 1 cup crushed Oreos
Ingredients for the Topping:
To finish off your cheesecake and give it an extra touch of flair, you’ll need a few garnishes:
- Whipped cream
- Whole Oreos
- Red velvet crumbs
Instructions
- Prepare the Crust: Preheat your oven to 350°F (175°C). In a medium bowl, mix the Oreo crumbs with melted butter. Press the mixture firmly into the bottom of a springform pan to create an even layer. Chill the crust while you prepare the cheesecake filling.
- Make the Cheesecake Filling: Beat the softened cream cheese and sugar in a large mixing bowl until smooth. Add the eggs one at a time, mixing well after each addition. Stir in the sour cream, vanilla extract, cocoa powder, and red food coloring, ensuring everything is well combined.
- Add the Crushed Oreos: Gently fold the crushed Oreos into the cheesecake mixture. Pour the mixture over the chilled crust, smoothing the top with a spatula.
- Bake the Cheesecake: Bake for 55-60 minutes, or until the cheesecake is set but slightly wobbly in the center. Once done, allow the cheesecake to cool completely at room temperature. Then, refrigerate it for at least 4 hours to set properly.
- Decorate and Serve: Once the cheesecake is fully chilled, it’s time to decorate! Top with whipped cream, whole Oreos, and red velvet crumbs for a beautiful and indulgent finishing touch.
Preparation and Cooking Time
- Prep Time: 20 minutes
- Cook Time: 60 minutes
- Total Time: 1 hour 20 minutes (plus 4 hours for chilling)
Notes
Serving Tips:
- Chill Before Serving: For the best texture and flavor, ensure that your Red Velvet Oreo Cheesecake is well-chilled. Allow it to set in the refrigerator for at least 4 hours (or overnight) before serving. This helps the flavors meld together and gives the cheesecake the perfect creamy consistency.
- Slice with Warm Knife: To get smooth, clean slices, dip a knife in warm water before cutting. Wipe the knife between each slice to maintain neat edges and keep your presentation looking beautiful.
- Pair with Fresh Berries: For an extra pop of color and flavor, serve your cheesecake with fresh berries like raspberries or strawberries. Their slight tartness complements the rich sweetness of the cheesecake.
- Add Extra Toppings: If you want to elevate the dessert, top it with additional whipped cream, crushed Oreos, or even a drizzle of chocolate syrup to make it even more decadent.
Storage Tips:
- Refrigerate Leftovers: Keep any leftover cheesecake tightly wrapped in plastic wrap or placed in an airtight container. Store it in the refrigerator for up to 5 days.
- Freezing for Later: If you want to enjoy this cheesecake later, you can freeze it. Wrap individual slices or the entire cheesecake in plastic wrap and then foil. Place it in an airtight container or freezer-safe bag. It can be frozen for up to 1-2 months. Thaw in the refrigerator overnight before serving.
- Keep the Toppings Separate: If you plan to store leftovers, consider keeping the whipped cream and decorative toppings separate. Add them just before serving to maintain their freshness and appearance.
