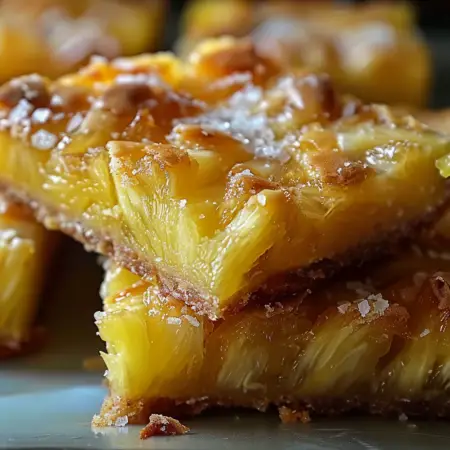
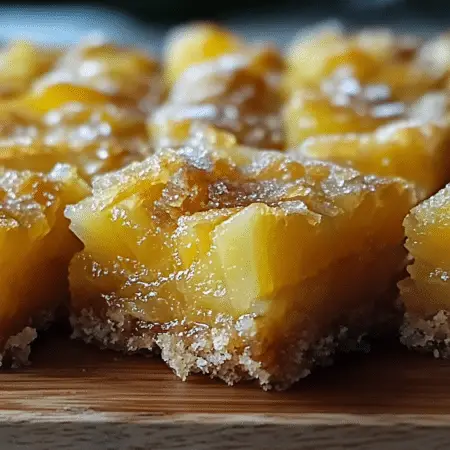
Craving a taste of the tropics? Look no further than these delectable Pineapple Bliss Bars! Bursting with the sweet and tangy flavor of pineapple, these bars are the perfect treat to transport your taste buds to paradise. Whether you’re hosting a summer barbecue, planning a family gathering, or simply indulging your sweet tooth, these bars are sure to be a hit with everyone.

Ingredients:
For the Crust:
- 2 cups all-purpose flour
- 1/2 cup granulated sugar
- 1/2 cup unsalted butter, softened
For the Filling:
- 1 can (20 oz) crushed pineapple, well-drained
- 1 cup sour cream
- 1/4 cup granulated sugar
- 2 large eggs
- 1 teaspoon vanilla extract
For Topping:
- Powdered sugar for dusting
Directions
1. Prepare the Crust:
- Preheat your oven to 350°F (175°C).
- In a bowl, mix together the flour and granulated sugar.
- Cut in the softened butter until the mixture becomes crumbly.
- Press the mixture into a greased 9×13 inch baking dish and bake for 15 minutes or until golden brown.
2. Make the Filling:
- While the crust is baking, prepare the filling.
- In a separate bowl, combine the drained crushed pineapple, sour cream, granulated sugar, eggs, and vanilla extract.
- Mix until smooth and well-combined.
3. Assemble and Bake:
- Once the crust is done baking, pour the prepared filling over the top.
- Return the dish to the oven and bake for an additional 25-30 minutes, or until the filling is set and slightly golden on top.
4. Finish:
- Allow the Pineapple Bliss Bars to cool completely in the baking dish.
- Once cooled, dust the top with powdered sugar.
- Cut into bars and serve.
Why You’ll Love Pineapple Bliss Bars:
- Irresistible Flavor: The combination of buttery crust and creamy pineapple filling creates a flavor explosion that’s simply irresistible.
- Easy to Make: With simple ingredients and easy-to-follow instructions, these bars are a breeze to whip up whenever the craving strikes.
- Perfect for Any Occasion: Whether you’re serving them at a party or enjoying them as a sweet treat at home, Pineapple Bliss Bars are always a hit.
- A Taste of Paradise: Close your eyes, take a bite, and let the tropical flavors transport you to your own personal paradise.

FAQs:
So what are you waiting for? Gather your ingredients, preheat your oven, and get ready to experience a slice of tropical bliss with these mouthwatering Pineapple Bliss Bars!
Print
Pineapple Bliss Bars
Description
Craving a taste of the tropics? Look no further than these delectable Pineapple Bliss Bars! Bursting with the sweet and tangy flavor of pineapple, these bars are the perfect treat to transport your taste buds to paradise. Whether you’re hosting a summer barbecue, planning a family gathering, or simply indulging your sweet tooth, these bars are sure to be a hit with everyone.
Ingredients
For the Crust:
- 2 cups all-purpose flour
- 1/2 cup granulated sugar
- 1/2 cup unsalted butter, softened
For the Filling:
- 1 can (20 oz) crushed pineapple, well-drained
- 1 cup sour cream
- 1/4 cup granulated sugar
- 2 large eggs
- 1 teaspoon vanilla extract
For Topping:
- Powdered sugar for dusting
Instructions
1. Prepare the Crust:
- Preheat your oven to 350°F (175°C).
- In a bowl, mix together the flour and granulated sugar.
- Cut in the softened butter until the mixture becomes crumbly.
- Press the mixture into a greased 9×13 inch baking dish and bake for 15 minutes or until golden brown.
2. Make the Filling:
- While the crust is baking, prepare the filling.
- In a separate bowl, combine the drained crushed pineapple, sour cream, granulated sugar, eggs, and vanilla extract.
- Mix until smooth and well-combined.
3. Assemble and Bake:
- Once the crust is done baking, pour the prepared filling over the top.
- Return the dish to the oven and bake for an additional 25-30 minutes, or until the filling is set and slightly golden on top.
4. Finish:
- Allow the Pineapple Bliss Bars to cool completely in the baking dish.
- Once cooled, dust the top with powdered sugar.
- Cut into bars and serve.
Why You’ll Love Pineapple Bliss Bars:
- Irresistible Flavor: The combination of buttery crust and creamy pineapple filling creates a flavor explosion that’s simply irresistible.
- Easy to Make: With simple ingredients and easy-to-follow instructions, these bars are a breeze to whip up whenever the craving strikes.
- Perfect for Any Occasion: Whether you’re serving them at a party or enjoying them as a sweet treat at home, Pineapple Bliss Bars are always a hit.
- A Taste of Paradise: Close your eyes, take a bite, and let the tropical flavors transport you to your own personal paradise.
Notes
Serving Tips:
- Chilled Delight: For an extra refreshing treat, chill the Pineapple Bliss Bars in the refrigerator before serving. The cool, creamy filling pairs perfectly with the buttery crust.
- Garnish with Fresh Fruit: Add a tropical twist to your presentation by garnishing each serving with fresh pineapple slices or a sprinkle of toasted coconut. Not only does it enhance the visual appeal, but it also adds an extra burst of flavor.
- Pair with Ice Cream: Take your dessert to the next level by serving each bar with a scoop of vanilla ice cream on the side. The creamy texture of the ice cream complements the richness of the bars, creating a decadent indulgence.
- Serve with Coffee or Tea: Enjoy your Pineapple Bliss Bars alongside a steaming cup of coffee or a soothing mug of tea for a delightful afternoon treat. The combination of flavors is sure to satisfy your sweet cravings.
Storage Tips:
- Refrigeration: Store any leftover Pineapple Bliss Bars in an airtight container in the refrigerator. They will stay fresh for up to 3-4 days.
- Freezing: If you’d like to extend the shelf life of your bars, you can also freeze them. Wrap individual bars tightly in plastic wrap or aluminum foil, then place them in a freezer-safe bag or container. They can be frozen for up to 2-3 months.
- Thawing: When ready to enjoy frozen bars, simply transfer them to the refrigerator and allow them to thaw overnight. Alternatively, you can reheat them in the microwave for a few seconds until warmed through.
- Avoid Moisture: To prevent the crust from becoming soggy, place a piece of parchment paper or wax paper between the layers of bars before storing them in the refrigerator or freezer.
