Peanut Butter Lunch Lady Cookie Bars
Description
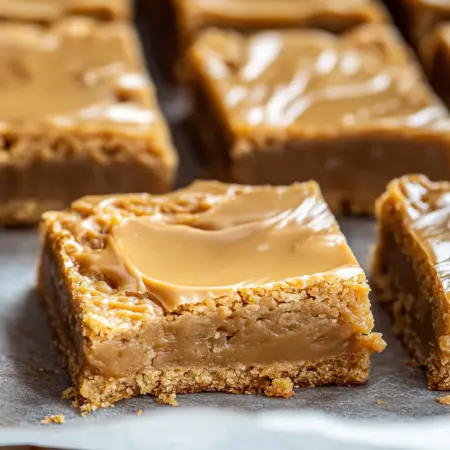
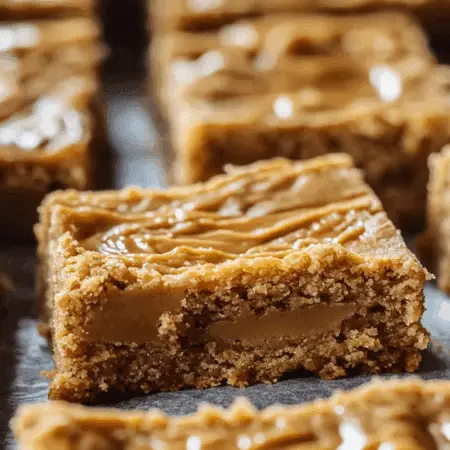
Craving a nostalgic, sweet treat that brings back memories of school days? Look no further than Peanut Butter Lunch Lady Cookie Bars! These delightful bars are rich, chewy, and topped with a creamy peanut butter frosting. Perfect for any occasion, they are sure to be a hit with both kids and adults alike. Follow this simple recipe to create a batch of these delicious bars in your own kitchen.
Ingredients
- 2 cups flour
- 2 cups sugar
- 2 large eggs, beaten
- 1 ½ cup peanut butter, divided
- 1 ½ cups (3 sticks) unsalted butter, softened
- ½ cup milk + 2 tablespoons, divided
- 1 teaspoon baking soda
- 1 teaspoon vanilla extract
- 1 teaspoon salt
- 4 cups powdered sugar
Instructions
1. Preheat and Prepare:
Preheat your oven to 400°F. Grease a large cookie sheet or line it with parchment paper to ensure the bars don’t stick and are easy to remove after baking.
2. Mix Dry Ingredients:
In a large mixing bowl, combine the flour, sugar, baking soda, and salt. Set this dry mixture aside for later use.
3. Prepare Wet Ingredients:
In another bowl, whisk together ½ cup of milk, vanilla extract, and beaten eggs. Set this wet mixture aside.
4. Cook Butter and Peanut Butter:
In a medium saucepan, melt 1 cup (2 sticks) of butter along with 1 cup of peanut butter. Bring this mixture to a boil, then remove it from the heat.
5. Combine Mixtures:
Slowly add the dry flour mixture to the melted butter and peanut butter mixture, stirring until well combined. Gradually add the milk and egg mixture, mixing thoroughly until you have a smooth batter.
6. Bake the Bars:
Pour the batter onto the prepared cookie sheet, spreading it evenly to the edges. Bake in the preheated oven for 20 minutes, or until a toothpick inserted into the center comes out clean. Allow the bars to cool completely before frosting.
7. Prepare the Frosting:
In a saucepan, bring the remaining 1 stick of butter and ½ cup of peanut butter to a boil. Add 2 tablespoons of milk and slowly mix in the powdered sugar until well combined and smooth.
8. Frost the Bars:
Pour the frosting over the cooled cookie bars, spreading it evenly to the edges. Allow the frosting to cool and set before cutting into bars and serving.
Notes
Serving Tips:
1. Cooling and Slicing:
- Cool Completely: Allow the cookie bars to cool completely in the pan before slicing. This helps the bars set properly and makes them easier to cut.
- Clean Slices: Use a sharp knife to cut the bars into even squares. For cleaner slices, wipe the knife with a damp cloth between cuts.
2. Presentation:
- Serving Plate: Arrange the cookie bars on a decorative serving plate for a visually appealing presentation.
- Garnish: Add a sprinkle of crushed peanuts or a drizzle of melted chocolate on top for an extra touch.
3. Pairings:
- Beverages: Serve the cookie bars with a cold glass of milk, a hot cup of coffee, or your favorite tea.
- Ice Cream: Pair the bars with a scoop of vanilla or chocolate ice cream for an indulgent dessert.
Storage Tips:
1. Room Temperature:
- Short-Term Storage: If you plan to eat the bars within a couple of days, store them at room temperature. Place the bars in an airtight container or cover them tightly with plastic wrap to keep them fresh.
2. Refrigeration:
- Extended Freshness: To keep the bars fresh for up to a week, store them in the refrigerator. Place the bars in an airtight container or wrap them tightly in plastic wrap to prevent them from drying out.
- Serving Tip: Allow the bars to come to room temperature before serving to enhance their flavor and texture.
3. Freezing:
- Long-Term Storage: Peanut Butter Lunch Lady Cookie Bars freeze well and can be stored for up to 3 months. Wrap individual bars tightly in plastic wrap, then place them in a freezer-safe bag or container.
- Thawing: When ready to enjoy, thaw the bars in the refrigerator overnight or at room temperature for a few hours.
4. Reheating:
- Microwave: If you prefer your bars warm, reheat individual slices in the microwave for about 10-15 seconds. Be cautious not to overheat, as the frosting can become too soft.
By following these serving and storage tips, you can ensure that your Peanut Butter Lunch Lady Cookie Bars remain fresh and delicious for days to come. Enjoy every bite of these nostalgic treats!


