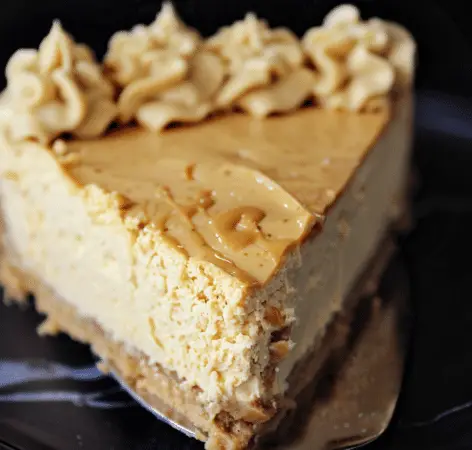
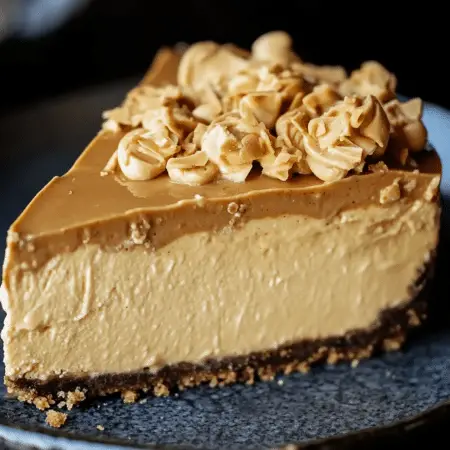
Indulge in a slice of pure bliss with this no-bake Peanut Butter Cheesecake! Combining the rich flavors of peanut butter and chocolate, this creamy and decadent dessert is a perfect treat for any occasion. With a crunchy graham cracker crust and a smooth, velvety filling, this cheesecake is topped with luscious cream cheese frosting and delightful peanut butter cups, making it a true delight for peanut butter lovers. Let’s dive into the recipe and create a dessert that will leave everyone craving more.

Ingredients:
For the Crust:
- 1 sleeve of Graham crackers, crushed
- 1 Tablespoon of sugar
- 4 Tablespoons of butter, melted
For the Filling:
- 3 (8-ounce) packages of cream cheese, softened
- 1 cup of sugar
- 1/2 cup of Greek yogurt
- 1 teaspoon of vanilla extract
- 1 cup of full-fat peanut butter
- 1 cup of powdered sugar
- 1/2 cup of mini chocolate chips
For the Topping:
- 1 container of cream cheese frosting
- Regular size peanut butter cups, halved
Directions:
For the Crust:
- Prepare the Pan: Line the bottom of a 6-inch spring-form pan with parchment paper and set aside.
- Crush the Graham Crackers: Place the graham crackers in a food processor and pulse until crushed into crumbs. Add the sugar and pulse to blend. Melt the butter in a microwave-safe bowl.
- Mix the Crust: Pour the graham cracker crumbs into the bowl with the melted butter and stir well to coat the crumbs.
- Press the Crust: Press the graham cracker mixture evenly into the bottom of the prepared spring-form pan using the bottom of a glass. Place the pan in the freezer to set.
For the Filling:
- Blend the Cream Cheese and Sugar: In the bowl of a stand mixer, blend the softened cream cheese and sugar on low until the cream cheese begins to soften and mix smoothly with the sugar. Scrape down the sides of the bowl and blend on medium-high until smooth and creamy.
- Add Greek Yogurt and Vanilla: Add the Greek yogurt and vanilla extract, blending until smooth.
- Incorporate Peanut Butter and Sugar: Add the peanut butter and powdered sugar, blending on low until mixed. Scrape down the sides of the bowl and blend on high until the mixture is smooth and creamy.
- Fold in Chocolate Chips: Gently fold in the mini chocolate chips.
- Assemble the Cheesecake: Remove the pan from the freezer and pour the peanut butter cheesecake filling into the spring-form pan. Smooth the top with the back of a spoon or a spatula. Place the pan back in the freezer overnight to allow the cheesecake to set.
Topping and Decorating:
- Prepare the Frosting: About 30 minutes before serving, prepare a pastry bag with a large fluted pastry tip and fill it with cream cheese frosting.
- Release the Cheesecake: Remove the cheesecake from the freezer and run a sharp knife around the sides of the cheesecake to release it from the spring-form. Remove the spring-form.
- Decorate: Pipe large dollops of frosting around the edge of the cheesecake and place halved peanut butter cups in the frosting between the dollops. Return the cheesecake to the freezer until ready to serve.
- Serve and Enjoy: When ready to serve, cut into 2-inch pieces and serve immediately. Enjoy!

This no-bake Peanut Butter Cheesecake is a must-try for any dessert lover, combining the classic flavors of peanut butter and chocolate into a creamy, luxurious treat. With its easy preparation and stunning presentation, it’s perfect for any occasion, from family gatherings to special celebrations. Give this recipe a try and delight your taste buds with every luscious bite. Enjoy the perfect harmony of flavors in this indulgent dessert!
Print
Peanut Butter Cheesecake
Description
Indulge in a slice of pure bliss with this no-bake Peanut Butter Cheesecake! Combining the rich flavors of peanut butter and chocolate, this creamy and decadent dessert is a perfect treat for any occasion. With a crunchy graham cracker crust and a smooth, velvety filling, this cheesecake is topped with luscious cream cheese frosting and delightful peanut butter cups, making it a true delight for peanut butter lovers. Let’s dive into the recipe and create a dessert that will leave everyone craving more.
Ingredients
For the Crust:
- 1 sleeve of Graham crackers, crushed
- 1 Tablespoon of sugar
- 4 Tablespoons of butter, melted
For the Filling:
- 3 (8-ounce) packages of cream cheese, softened
- 1 cup of sugar
- 1/2 cup of Greek yogurt
- 1 teaspoon of vanilla extract
- 1 cup of full-fat peanut butter
- 1 cup of powdered sugar
- 1/2 cup of mini chocolate chips
For the Topping:
- 1 container of cream cheese frosting
- Regular size peanut butter cups, halved
Instructions
For the Crust:
- Prepare the Pan: Line the bottom of a 6-inch spring-form pan with parchment paper and set aside.
- Crush the Graham Crackers: Place the graham crackers in a food processor and pulse until crushed into crumbs. Add the sugar and pulse to blend. Melt the butter in a microwave-safe bowl.
- Mix the Crust: Pour the graham cracker crumbs into the bowl with the melted butter and stir well to coat the crumbs.
- Press the Crust: Press the graham cracker mixture evenly into the bottom of the prepared spring-form pan using the bottom of a glass. Place the pan in the freezer to set.
For the Filling:
- Blend the Cream Cheese and Sugar: In the bowl of a stand mixer, blend the softened cream cheese and sugar on low until the cream cheese begins to soften and mix smoothly with the sugar. Scrape down the sides of the bowl and blend on medium-high until smooth and creamy.
- Add Greek Yogurt and Vanilla: Add the Greek yogurt and vanilla extract, blending until smooth.
- Incorporate Peanut Butter and Sugar: Add the peanut butter and powdered sugar, blending on low until mixed. Scrape down the sides of the bowl and blend on high until the mixture is smooth and creamy.
- Fold in Chocolate Chips: Gently fold in the mini chocolate chips.
- Assemble the Cheesecake: Remove the pan from the freezer and pour the peanut butter cheesecake filling into the spring-form pan. Smooth the top with the back of a spoon or a spatula. Place the pan back in the freezer overnight to allow the cheesecake to set.
Topping and Decorating:
- Prepare the Frosting: About 30 minutes before serving, prepare a pastry bag with a large fluted pastry tip and fill it with cream cheese frosting.
- Release the Cheesecake: Remove the cheesecake from the freezer and run a sharp knife around the sides of the cheesecake to release it from the spring-form. Remove the spring-form.
- Decorate: Pipe large dollops of frosting around the edge of the cheesecake and place halved peanut butter cups in the frosting between the dollops. Return the cheesecake to the freezer until ready to serve.
- Serve and Enjoy: When ready to serve, cut into 2-inch pieces and serve immediately. Enjoy!
Notes
Serving Tips:
- Perfect Presentation: Serve your Peanut Butter Cheesecake on a beautiful cake stand or platter to showcase its decadent layers and elegant toppings.
- Slice with Ease: Use a sharp knife dipped in hot water to slice the cheesecake cleanly. Wipe the knife between cuts to maintain neat slices.
- Pairings: Complement the rich flavors of the cheesecake with a side of fresh berries or a drizzle of chocolate sauce for added indulgence.
- Serve Chilled: For the best texture and flavor, serve the cheesecake chilled directly from the refrigerator or freezer.
- Garnish Creatively: Add an extra touch of flair by garnishing each slice with a sprinkle of crushed peanuts or a dollop of whipped cream.
Storage Tips:
- Refrigeration: Store any leftover cheesecake in the refrigerator. Cover it loosely with plastic wrap or place it in an airtight container. It will stay fresh for up to 5 days.
- Freezing: For longer storage, you can freeze the cheesecake. Wrap it tightly in plastic wrap and then in aluminum foil or place it in a freezer-safe container. It can be frozen for up to 3 months.
- Thawing: When ready to enjoy a frozen slice, transfer it to the refrigerator and let it thaw overnight for the best texture.
- Avoid Moisture: Ensure the cheesecake is well-covered to prevent it from absorbing any refrigerator or freezer odors and to keep it from becoming dry.
- Individual Slices: If you anticipate having leftovers, consider slicing the cheesecake into individual portions before freezing. This makes it easier to thaw and enjoy single servings without having to defrost the entire cheesecake.
With these serving and storage tips, you can enjoy every bite of your Peanut Butter Cheesecake at its best, whether it’s freshly made or savored as a delightful leftover treat!
