Olive Garden Breadsticks

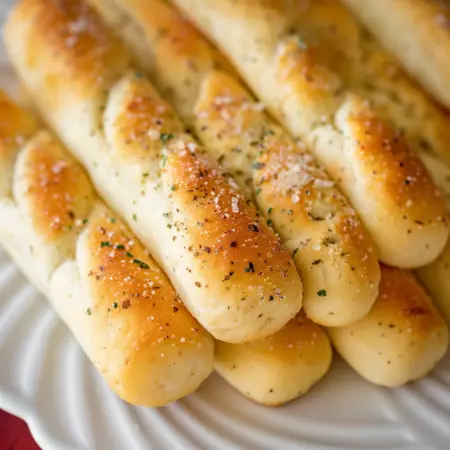
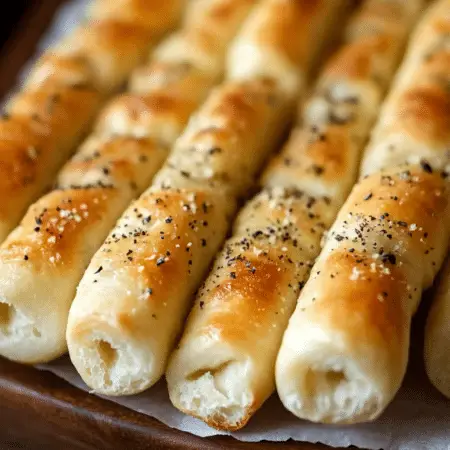
Love Olive Garden’s famous breadsticks? Now you can make them yourself with this easy and delicious recipe! These breadsticks are soft, fluffy, and brushed with a garlic butter topping that makes them irresistible. Perfect for serving alongside your favorite Italian dishes or enjoying as a snack on their own.

Ingredients:

  • 1 ½ cups warm water (110 degrees)
  • 2 ¼ teaspoons active dry yeast (1 package)
  • 2 tablespoons sugar
  • 4 ¼ cups bread flour
  • 1 tablespoon salt
  • 2 tablespoons melted butter
  • ¼ cup butter, melted
  • 1 teaspoon garlic salt

Directions:

Activate Yeast:

In a small bowl, combine warm water, sugar, and active dry yeast. Let it sit for about 5 minutes until foamy.

Mix Dough:

In a large bowl, whisk together bread flour and salt. Add melted butter and the foamy yeast mixture. Mix until the dough starts to come together.

Knead Dough:

Turn the dough onto a lightly floured surface and knead for about 5 minutes until smooth and elastic.

Divide and Shape:

Form the dough into a square on your countertop. Divide it into 12 equal pieces. Roll each piece into a breadstick shape.

First Rise:

Place the shaped breadsticks on a lined baking sheet. Cover them with a kitchen towel and let them rise for about 45 minutes, until they are puffy.

Bake:

Preheat the oven to 400°F (200°C). Bake the breadsticks for about 12 minutes, or until they are lightly browned.

Prepare Topping:

While the breadsticks are baking, mix melted butter and garlic salt together.

Finish and Serve:

Remove the breadsticks from the oven and immediately brush them with the garlic butter mixture while they are still warm. Allow the breadsticks to cool slightly before serving. Enjoy them warm with your favorite meals!

Prep Time: 1 hr | Cooking Time: 12 min | Total Time: 1 hr 15 min | Servings: 12

Serving and Storage Tips :

Once you’ve mastered the art of making these irresistible Olive Garden-style breadsticks, here are some tips on serving and storing them:

1. Serving Suggestions:

  • Fresh and Warm: Olive Garden breadsticks are best enjoyed fresh out of the oven when they are warm and fragrant. Serve them alongside your favorite Italian dishes like pasta, lasagna, or soup.
  • Dipping Sauces: Pair these breadsticks with marinara sauce, Alfredo sauce, or even a simple olive oil and balsamic vinegar dip for an extra burst of flavor.

2. Storage Tips:

  • Room Temperature: If you plan to consume the breadsticks within a day or two, store them at room temperature in an airtight container or wrapped tightly in foil. This helps maintain their softness.
  • Freezing: To store for longer periods, let the breadsticks cool completely, then place them in a freezer-safe bag or container. They can be stored in the freezer for up to 2-3 months.
  • Reheating: When ready to enjoy again, thaw frozen breadsticks at room temperature or in the microwave. To regain their freshness, warm them in the oven at 350°F (175°C) for a few minutes until heated through.

3. Serving Size Adjustments:

  • Smaller Portions: If you prefer smaller portions or are serving a larger crowd, you can divide the dough into more than 12 pieces. Adjust baking time accordingly to ensure they are baked through.

4. Garnish and Presentation:

  • Fresh Herbs: Sprinkle chopped fresh parsley or basil over the breadsticks just before serving for a pop of color and freshness.
  • Garlic Butter: For an extra indulgent touch, drizzle a bit more garlic butter over the breadsticks after they come out of the oven.

5. Make Ahead:

  • Advance Preparation: If you’re planning a meal ahead of time, you can prepare the dough and shape the breadsticks in advance. Store them covered in the refrigerator overnight, then let them come to room temperature and rise before baking.

With these tips, you can elevate your homemade Olive Garden breadsticks experience, whether you’re serving them for a cozy family dinner or entertaining guests. Enjoy the warmth and aroma of freshly baked breadsticks that rival your favorite restaurant’s!
Variations :

While the classic Olive Garden breadsticks are already a hit, here are some creative variations to add a twist to your homemade batch:

1. Cheesy Garlic Breadsticks:

  • Ingredients: Add shredded mozzarella or Parmesan cheese to the dough before shaping. After baking, sprinkle more cheese on top while they’re still warm.

2. Herbed Breadsticks:

  • Ingredients: Mix dried herbs such as oregano, basil, and thyme into the dough before kneading. Brush with garlic butter mixed with finely chopped fresh herbs like parsley or rosemary.

3. Whole Wheat Breadsticks:

  • Ingredients: Substitute half or all of the bread flour with whole wheat flour for a healthier option. Adjust the amount of water slightly if needed.

4. Spicy Breadsticks:

  • Ingredients: Add a pinch of crushed red pepper flakes or cayenne pepper to the dough for a spicy kick. Brush with melted butter infused with more spice or hot sauce.

5. Stuffed Breadsticks:

  • Ingredients: Flatten each portion of dough and place a strip of mozzarella cheese or pepperoni slices in the center. Fold the dough over and seal tightly before baking.

6. Sweet Cinnamon Sugar Breadsticks:

  • Ingredients: Skip the garlic salt and instead brush the warm breadsticks with melted butter and sprinkle generously with cinnamon sugar.

7. Everything Bagel Breadsticks:

  • Ingredients: Before baking, sprinkle the breadsticks with an “everything bagel” seasoning blend consisting of sesame seeds, poppy seeds, dried garlic, dried onion, and salt.

8. Pesto Parmesan Breadsticks:

  • Ingredients: Mix pesto sauce into the dough or brush the baked breadsticks with pesto and sprinkle with grated Parmesan cheese.

9. Honey Butter Breadsticks:

  • Ingredients: Replace the garlic butter with a mixture of melted butter and honey for a sweet and savory combination.

10. Gluten-Free Option:

  • Ingredients: Use a gluten-free all-purpose flour blend instead of bread flour. Ensure the yeast and other ingredients are gluten-free as well.

With these variations, you can cater to different tastes and occasions, from savory appetizers to sweet treats. Enjoy exploring the endless possibilities of homemade breadsticks that will surely impress your family and guests!

FAQs :

1. Can I use instant yeast instead of active dry yeast?

  • Yes, you can substitute instant yeast for active dry yeast in equal amounts. Instant yeast does not need to be proofed in warm water and can be mixed directly with the dry ingredients.

2. How can I tell if the yeast is still active?

  • After letting the yeast sit in warm water with sugar, it should become foamy within about 5-10 minutes. This foaming indicates that the yeast is active and ready to use.

3. Can I make the dough ahead of time and refrigerate it overnight?

  • Yes, you can prepare the dough up to the point of shaping the breadsticks. After kneading, place the dough in a greased bowl, cover tightly, and refrigerate overnight. Let it come to room temperature and rise before shaping and baking.

4. What can I use if I don’t have bread flour?

  • If you don’t have bread flour, you can use all-purpose flour as a substitute. The texture may be slightly different, but the breadsticks will still turn out delicious.

5. How do I store leftover breadsticks?

  • Store leftover breadsticks in an airtight container at room temperature for up to 2 days. For longer storage, freeze them in a freezer-safe bag or container for up to 2-3 months.

6. Can I reheat frozen breadsticks?

  • Yes, thaw frozen breadsticks at room temperature or in the microwave. To refresh them, warm in a preheated oven at 350°F (175°C) for a few minutes until heated through.

7. Can I double the recipe to make more breadsticks?

  • Yes, you can double or even triple the recipe to make a larger batch of breadsticks. Make sure to adjust the rising time and baking batches accordingly.

8. How can I prevent my breadsticks from becoming too dry?

  • Brushing the breadsticks with the garlic butter immediately after baking helps keep them moist. You can also store them properly in an airtight container to maintain their softness.

9. Can I make gluten-free breadsticks with this recipe?

  • Yes, you can use a gluten-free all-purpose flour blend instead of bread flour. Ensure all ingredients, including yeast and seasonings, are gluten-free.

10. What can I serve with Olive Garden breadsticks?

  • These breadsticks are perfect for serving with pasta dishes like spaghetti or lasagna, soups, salads, or as a snack with dipping sauces like marinara or Alfredo.

These FAQs should help address common queries and ensure you have a successful experience making and enjoying homemade Olive Garden-style breadsticks!

Now you’re ready to impress your family and friends with homemade Olive Garden breadsticks that taste just like the real deal!