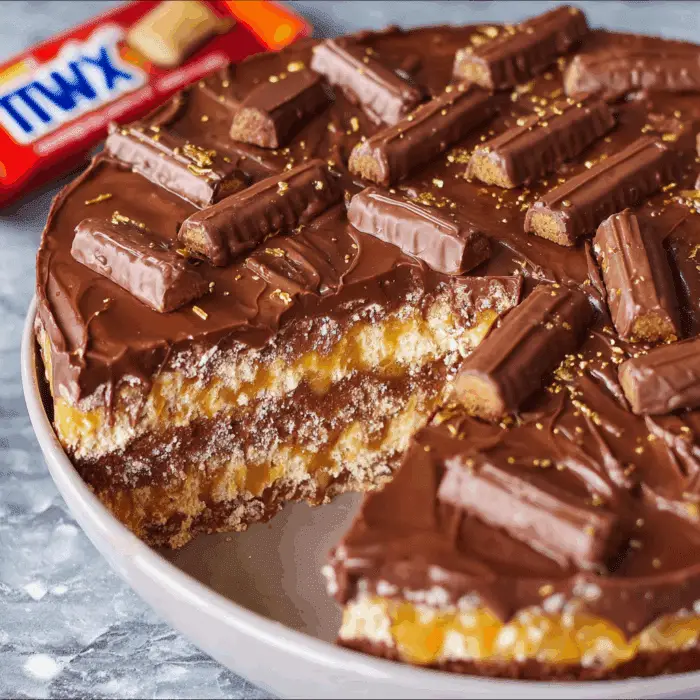
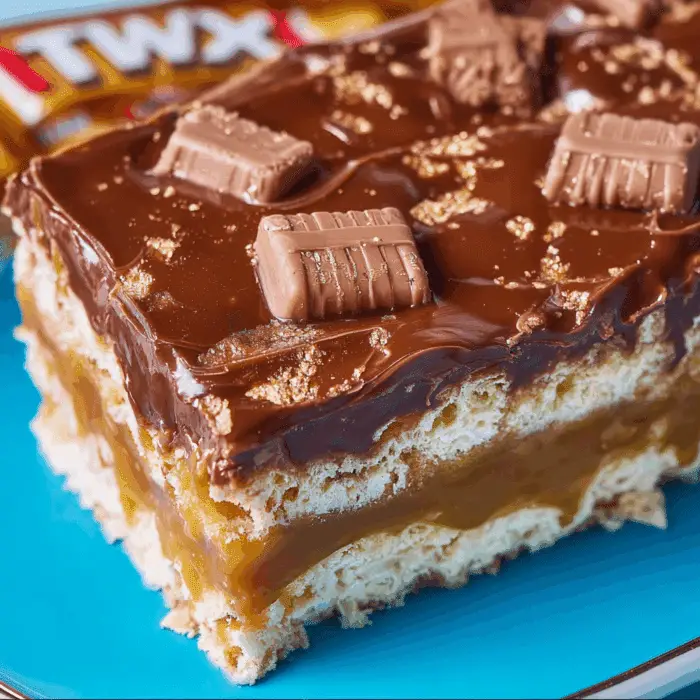
If you’re craving an indulgent dessert that doesn’t require turning on your oven, this No-Bake Twix Cake is the ultimate treat. Layered with creamy chocolate pudding, fluffy whipped topping, vanilla wafer cookies, and chunks of Twix candy bars, this chilled dessert delivers the perfect balance of sweet and salty in every bite. Whether you’re planning a summer get-together, birthday celebration, or simply want a quick dessert fix, this no-bake recipe is guaranteed to be a hit.

Ingredients
To make this irresistible No-Bake Twix Cake, you’ll need:
- 11 ounces of vanilla wafers
- 6.8 ounces (two 3.4-ounce boxes) of milk chocolate pudding
- 4 cups milk
- 16 ounces of Cool Whip
- 2 cups Twix bars, chopped (about 5-6 full-size bars)
- 32 ounces (two 16-ounce containers) of milk chocolate frosting
- 1/3 cup caramel topping
These everyday ingredients come together to make a layered dessert that tastes just like your favorite candy bar—only better.
Instructions
- Chop Twix Bars:
Cut Twix candy bars into bite-sized pieces. You’ll need about 2 cups total (roughly 5–6 bars). - Prepare Pudding:
In a bowl, mix the chocolate pudding with 4 cups of milk according to package instructions. - Combine Pudding and Cool Whip:
In a stand mixer or large bowl, blend the prepared pudding and Cool Whip until smooth and fluffy. - Create Bottom Layer:
In a 9×13-inch baking dish, line the bottom with a single layer of vanilla wafer cookies. - Add First Pudding Layer:
Spread half of the pudding-Cool Whip mixture evenly over the cookies. - Add Second Cookie Layer:
Place another layer of vanilla wafers on top of the pudding. - Add Second Pudding Layer:
Spread the remaining pudding mixture on top of the second cookie layer. - Sprinkle Twix Bars:
Add 1 cup of the chopped Twix bars evenly over the pudding. - Final Cookie Layer:
Add a third and final layer of vanilla wafer cookies. - Melt and Add Frosting:
Microwave each container of chocolate frosting (with foil removed) for about 45 seconds until pourable. Stir well and pour over the entire cake. - Top with Twix and Caramel:
Sprinkle the remaining chopped Twix bars over the frosting. Drizzle the caramel topping evenly over the cake. - Chill:
Place the cake in the freezer for at least 2 hours, or preferably overnight, until set. - Serve:
Slice and serve chilled. Store leftovers covered in the refrigerator.

Serving and Storage Tips
Serving Tips:
- Chill Before Serving:
For the best texture and flavor, allow the cake to chill for at least 2 hours—overnight is even better. This helps the layers set perfectly. - Use a Hot Knife for Clean Slices:
Dip a sharp knife in hot water and wipe it dry before slicing. Repeat between cuts for neat, clean squares. - Serve Cold:
This cake is best served cold straight from the fridge or slightly thawed from the freezer. The cold enhances the creamy texture and keeps the layers firm. - Top with Extra Drizzle (Optional):
Add an extra drizzle of caramel or chocolate syrup right before serving for added flair and flavor.
Storage Tips:
- Refrigerator:
Store the cake covered in the refrigerator for up to 3–4 days. Use plastic wrap or an airtight lid to keep it fresh and prevent it from drying out. - Freezer:
You can freeze the cake for up to 1 week. Wrap tightly in plastic wrap and then foil or place in an airtight container. Thaw in the fridge for a few hours before serving. - Avoid Room Temperature:
Because of the whipped topping, pudding, and frosting, this cake should not be left out at room temperature for more than 1 hour.
With proper storage, your No-Bake Twix Cake will stay fresh, creamy, and delicious for days—making it perfect for prepping ahead for parties, holidays, or anytime dessert cravings.
Variations
Peanut Butter Twix Cake
Swap regular Twix bars with Peanut Butter Twix. Add 1/2 cup of creamy peanut butter to the pudding and Cool Whip mixture before layering. Optionally drizzle melted peanut butter along with the caramel topping. The creamy peanut butter balances the sweetness and adds a salty, nutty depth.
Oreo Cookie Crust Variation
Replace vanilla wafers with crushed Oreos or whole chocolate sandwich cookies. Use white chocolate pudding instead of milk chocolate for a flavor contrast. This adds a rich, chocolatey base that pairs beautifully with the caramel and candy.
Salted Caramel Pretzel Twix Cake
Add a layer of crushed pretzels between the pudding and cookie layers. Use salted caramel sauce instead of regular caramel topping. The salty pretzels bring crunch and balance the sweetness perfectly.
Chocolate Lover’s Deluxe
Use chocolate wafer cookies instead of vanilla wafers. Add mini chocolate chips or a layer of ganache between the pudding layers. Swap Cool Whip with chocolate whipped topping. This is the ultimate indulgence for chocolate fans.
Twix Ice Cream Cake
Replace the pudding and Cool Whip mixture with softened vanilla or caramel ice cream. Let the ice cream slightly melt and spread it between the cookie layers, then refreeze immediately. This frozen version is perfect for hot days and summer parties.
Mini Twix Cake Cups
Assemble the cake in individual dessert cups or jars instead of a large dish. Layer cookies, pudding mixture, Twix pieces, and toppings as usual. This variation is great for portion control and easy serving at gatherings or events.
White Chocolate & Raspberry Twix Cake
Use white chocolate pudding in place of milk chocolate. Add a thin layer of raspberry jam between the cookie and pudding layers. Use White Chocolate Twix if available. This adds a fruity brightness and a smooth, mellow sweetness for a more elegant twist.
These creative variations make it easy to personalize your No-Bake Twix Cake for any occasion or flavor preference, while keeping the same easy no-bake method.
FAQs
1. Can I make No-Bake Twix Cake ahead of time?
Yes, this dessert is perfect for making ahead. Prepare it the day before and let it chill in the fridge overnight to set properly and enhance the flavors.
2. Can I use homemade whipped cream instead of Cool Whip?
Yes, you can substitute with homemade whipped cream. Use 2 cups of heavy whipping cream whipped with 2–3 tablespoons of powdered sugar until stiff peaks form.
3. Do I have to freeze the cake or is refrigeration enough?
You can refrigerate the cake for at least 4–6 hours if you prefer a softer texture, but freezing for 2 hours or more helps it firm up for cleaner slices.
4. What can I use instead of vanilla wafer cookies?
You can use graham crackers, shortbread cookies, or crushed Oreos for a different flavor and texture.
5. Can I use sugar-free pudding or low-fat ingredients?
Yes, sugar-free pudding, skim milk, and light Cool Whip can be used to make a lighter version. The texture and taste may vary slightly but it will still be delicious.
6. Can I add other candy bars instead of Twix?
Absolutely. You can use Snickers, Milky Way, Kit Kat, or any caramel-based candy bars for a fun twist on the original recipe.
7. How long does No-Bake Twix Cake last in the fridge?
The cake will stay fresh in the refrigerator for up to 3–4 days when stored covered or in an airtight container.
8. Can I freeze leftovers?
Yes, wrap slices in plastic wrap and place in a freezer-safe container. Freeze for up to one week. Thaw in the fridge for a few hours before serving.
9. Is this dessert suitable for kids?
Definitely. It’s kid-friendly and fun to make with children. Just be cautious with any candy bar chunks for very young kids.
10. Can I make it in a smaller dish?
Yes, you can cut the recipe in half and use an 8×8 or 9×9-inch pan. Adjust layering accordingly and reduce chilling time slightly.
No-Bake Twix Cake is the ultimate treat for candy bar lovers and dessert enthusiasts alike. With layers of cookies, creamy pudding, chocolate frosting, and caramel-drizzled Twix pieces, this no-fuss recipe checks all the boxes. It’s easy, it’s delicious, and it brings the wow factor to any dessert table. If you’re looking for a make-ahead dessert that’s rich, sweet, and absolutely irresistible, this is it.
Print
No-Bake Twix Cake
Description
If you’re craving an indulgent dessert that doesn’t require turning on your oven, this No-Bake Twix Cake is the ultimate treat. Layered with creamy chocolate pudding, fluffy whipped topping, vanilla wafer cookies, and chunks of Twix candy bars, this chilled dessert delivers the perfect balance of sweet and salty in every bite. Whether you’re planning a summer get-together, birthday celebration, or simply want a quick dessert fix, this no-bake recipe is guaranteed to be a hit.
Ingredients
- 11 ounces of vanilla wafers
- 6.8 ounces (two 3.4-ounce boxes) of milk chocolate pudding
- 4 cups milk
- 16 ounces of Cool Whip
- 2 cups Twix bars, chopped (about 5–6 full-size bars)
- 32 ounces (two 16-ounce containers) of milk chocolate frosting
- 1/3 cup caramel topping
Instructions
-
Chop Twix Bars:
Cut Twix candy bars into bite-sized pieces. You’ll need about 2 cups total (roughly 5–6 bars). -
Prepare Pudding:
In a bowl, mix the chocolate pudding with 4 cups of milk according to package instructions. -
Combine Pudding and Cool Whip:
In a stand mixer or large bowl, blend the prepared pudding and Cool Whip until smooth and fluffy. -
Create Bottom Layer:
In a 9×13-inch baking dish, line the bottom with a single layer of vanilla wafer cookies. -
Add First Pudding Layer:
Spread half of the pudding-Cool Whip mixture evenly over the cookies. -
Add Second Cookie Layer:
Place another layer of vanilla wafers on top of the pudding. -
Add Second Pudding Layer:
Spread the remaining pudding mixture on top of the second cookie layer. -
Sprinkle Twix Bars:
Add 1 cup of the chopped Twix bars evenly over the pudding. -
Final Cookie Layer:
Add a third and final layer of vanilla wafer cookies. -
Melt and Add Frosting:
Microwave each container of chocolate frosting (with foil removed) for about 45 seconds until pourable. Stir well and pour over the entire cake. -
Top with Twix and Caramel:
Sprinkle the remaining chopped Twix bars over the frosting. Drizzle the caramel topping evenly over the cake. -
Chill:
Place the cake in the freezer for at least 2 hours, or preferably overnight, until set. -
Serve:
Slice and serve chilled. Store leftovers covered in the refrigerator.
Notes
Serving Tips:
- Chill Before Serving:
For the best texture and flavor, allow the cake to chill for at least 2 hours—overnight is even better. This helps the layers set perfectly. - Use a Hot Knife for Clean Slices:
Dip a sharp knife in hot water and wipe it dry before slicing. Repeat between cuts for neat, clean squares. - Serve Cold:
This cake is best served cold straight from the fridge or slightly thawed from the freezer. The cold enhances the creamy texture and keeps the layers firm. - Top with Extra Drizzle (Optional):
Add an extra drizzle of caramel or chocolate syrup right before serving for added flair and flavor.
Storage Tips:
- Refrigerator:
Store the cake covered in the refrigerator for up to 3–4 days. Use plastic wrap or an airtight lid to keep it fresh and prevent it from drying out. - Freezer:
You can freeze the cake for up to 1 week. Wrap tightly in plastic wrap and then foil or place in an airtight container. Thaw in the fridge for a few hours before serving. - Avoid Room Temperature:
Because of the whipped topping, pudding, and frosting, this cake should not be left out at room temperature for more than 1 hour.