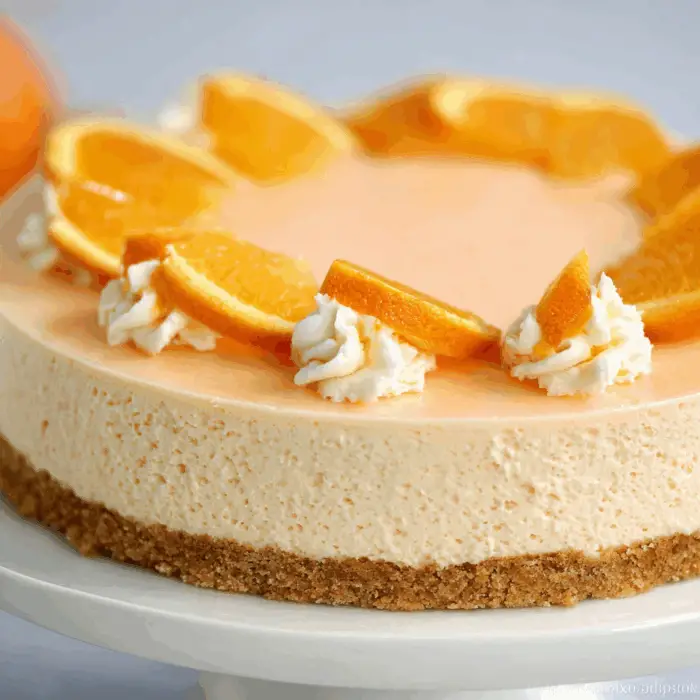
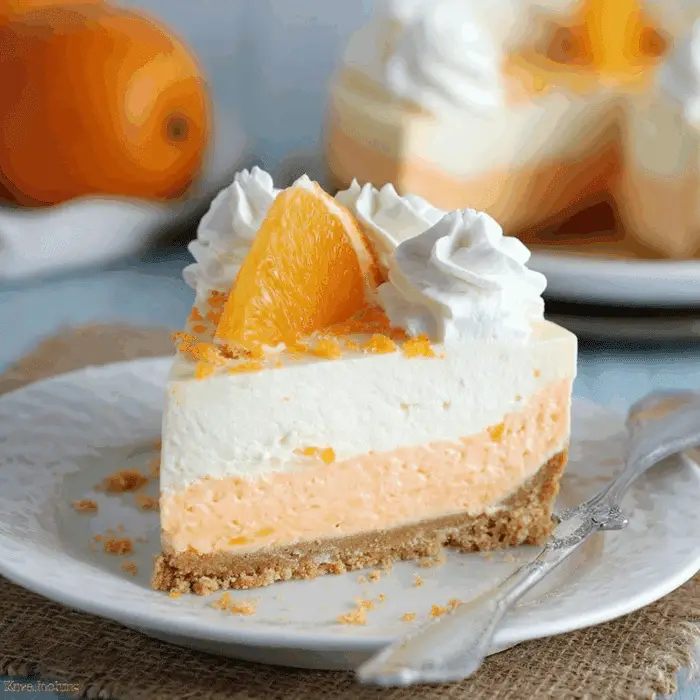
If you’re craving a cool and refreshing dessert that doesn’t require turning on the oven, this No Bake Orange Creamsicle Cheesecake is the answer. It features a buttery vanilla wafer crust, creamy cheesecake layers, and a bright, citrusy orange filling. Perfect for summer parties, BBQs, or any time you want a nostalgic Creamsicle flavor in an elegant dessert.

Ingredients
- 11 oz Vanilla Wafer Cookies
- 1 1/2 cups Sugar, divided
- 4 tbsp melted Butter
- 16 oz Cream Cheese, softened
- 16 oz Heavy Cream
- 1 (3.3 oz) box Orange Gelatin
- 1 cup boiling Water
- Zest from 1 Orange
- 1/4 tsp Vanilla Extract
- 1/2 cup Powdered Sugar
Instructions
- Place vanilla wafers in a food processor and pulse until finely crushed.
- Add 3/4 cup sugar and melted butter, then pulse to combine.
- Grease a 9-inch springform pan and press crust mixture into the bottom and slightly up the sides.
- Freeze crust for 30 minutes.
- Beat cream cheese with remaining sugar until smooth.
- In a bowl, dissolve orange gelatin in boiling water and set aside to cool.
- Zest the orange and set aside.
- Whip heavy cream with powdered sugar and vanilla until stiff peaks form.
- Add half of the whipped cream mixture to the cooled gelatin along with orange zest; whisk to combine.
- Fold remaining whipped cream into the cream cheese mixture.
- Spread half of the cream cheese mixture over the crust.
- Pour 2 cups of the orange mixture over the cream cheese layer.
- Spread remaining cream cheese mixture gently over the orange layer.
- Pour remaining orange mixture on top.
- Optional: Swirl layers gently with a butter knife for a marbled effect.
- Refrigerate for at least 6 hours before serving.

Serving and Storage Tips
- Serve the cheesecake chilled straight from the refrigerator for the best texture and flavor.
- Garnish with extra orange zest, whipped cream, or fresh orange slices for a pretty presentation.
- Use a sharp knife dipped in hot water and wiped clean between cuts for perfect slices.
- Store covered in the refrigerator for up to 4 days.
- For longer storage, freeze individual slices wrapped in plastic wrap and aluminum foil for up to 2 months. Thaw in the refrigerator before serving.
Variations
- Lemon Twist – Swap the orange gelatin for lemon gelatin and use lemon zest for a tangier flavor.
- Tropical Delight – Use pineapple gelatin and fold in crushed pineapple (drained well) for a tropical touch.
- Chocolate Orange – Add a thin layer of melted chocolate over the crust before adding the filling for a chocolate-and-orange combination.
- Berry Creamsicle – Replace the orange gelatin with strawberry or raspberry gelatin and garnish with fresh berries.
- Mandarin Orange Layer – Fold canned mandarin orange segments into the orange gelatin mixture for added texture and flavor.
- Coconut Creamsicle – Add 1/2 cup shredded coconut to the crust and a teaspoon of coconut extract to the filling for a tropical twist.
- Mini Cheesecakes – Divide the crust and filling into cupcake liners for individual servings, reducing chilling time to about 3 hours.
- Graham Cracker Base – Swap the vanilla wafer crust for a graham cracker crust for a more classic cheesecake flavor.
- Vanilla Bean Boost – Add fresh vanilla bean seeds to the cream cheese mixture for a richer vanilla flavor.
- Layered Parfait Style – Assemble in dessert glasses with alternating layers of crust crumbs, cream cheese mixture, and orange gelatin mixture for a no-slice serving option.
FAQs
- Can I make this cheesecake ahead of time?
Yes, it’s perfect for making 1–2 days in advance. - Can I use Cool Whip instead of whipping cream?
Yes, substitute equal amounts, but the texture will be slightly lighter. - Do I need a springform pan?
It’s recommended for easy removal, but a deep pie dish can also work. - Can I use sugar-free gelatin?
Yes, for a lower-sugar option, but it may slightly change the texture. - What can I use instead of vanilla wafers?
Graham crackers, shortbread cookies, or Oreos work well. - How long does it need to chill?
At least 6 hours, but overnight gives the best results. - Can I skip the gelatin?
No, gelatin is needed to help the cheesecake layers set. - Can I add fruit inside the layers?
Yes, try mandarin oranges, strawberries, or blueberries. - Will the cheesecake hold up outdoors?
Only for a short time; keep chilled until ready to serve. - Can I make this dairy-free?
Yes, use dairy-free cream cheese and coconut whipped cream, but flavor and texture may vary.
This No Bake Orange Creamsicle Cheesecake is a dreamy combination of creamy, citrusy layers that melt in your mouth. With no oven required, it’s an effortless dessert that’s big on flavor and presentation. Whether for a summer cookout, a picnic, or simply to satisfy a sweet tooth, this cheesecake will be a crowd favorite every time.
Print
No Bake Orange Creamsicle Cheesecake
Description
If you’re craving a cool and refreshing dessert that doesn’t require turning on the oven, this No Bake Orange Creamsicle Cheesecake is the answer. It features a buttery vanilla wafer crust, creamy cheesecake layers, and a bright, citrusy orange filling. Perfect for summer parties, BBQs, or any time you want a nostalgic Creamsicle flavor in an elegant dessert.
Ingredients
- 11 oz Vanilla Wafer Cookies
- 1 1/2 cups Sugar, divided
- 4 tbsp melted Butter
- 16 oz Cream Cheese, softened
- 16 oz Heavy Cream
- 1 (3.3 oz) box Orange Gelatin
- 1 cup boiling Water
- Zest from 1 Orange
- 1/4 tsp Vanilla Extract
- 1/2 cup Powdered Sugar
Instructions
- Place vanilla wafers in a food processor and pulse until finely crushed.
- Add 3/4 cup sugar and melted butter, then pulse to combine.
- Grease a 9-inch springform pan and press crust mixture into the bottom and slightly up the sides.
- Freeze crust for 30 minutes.
- Beat cream cheese with remaining sugar until smooth.
- In a bowl, dissolve orange gelatin in boiling water and set aside to cool.
- Zest the orange and set aside.
- Whip heavy cream with powdered sugar and vanilla until stiff peaks form.
- Add half of the whipped cream mixture to the cooled gelatin along with orange zest; whisk to combine.
- Fold remaining whipped cream into the cream cheese mixture.
- Spread half of the cream cheese mixture over the crust.
- Pour 2 cups of the orange mixture over the cream cheese layer.
- Spread remaining cream cheese mixture gently over the orange layer.
- Pour remaining orange mixture on top.
- Optional: Swirl layers gently with a butter knife for a marbled effect.
- Refrigerate for at least 6 hours before serving.
Notes
- Serve the cheesecake chilled straight from the refrigerator for the best texture and flavor.
- Garnish with extra orange zest, whipped cream, or fresh orange slices for a pretty presentation.
- Use a sharp knife dipped in hot water and wiped clean between cuts for perfect slices.
- Store covered in the refrigerator for up to 4 days.
- For longer storage, freeze individual slices wrapped in plastic wrap and aluminum foil for up to 2 months. Thaw in the refrigerator before serving.