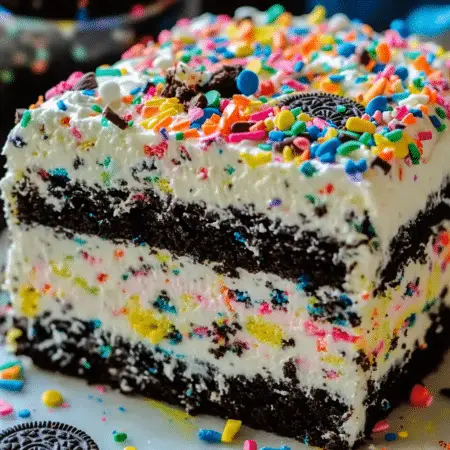
No-Bake Funfetti Oreo Icebox Cake
Description
Looking for a dessert that’s as festive as it is effortless? Look no further than the No-Bake Funfetti Oreo Icebox Cake! Whether you’re marking a special occasion or simply treating yourself, this recipe is a guaranteed crowd-pleaser. With layers of creamy goodness, crunchy Oreos, and bursts of colorful sprinkles, it’s a party on a plate. Plus, since it’s a no-bake delight, you can whip it up without breaking a sweat. Let’s dive into the recipe and make some sweet memories!
Ingredients
- 2 packages of birthday cake Oreos (you can use regular or Double Stuf Oreos)
- 2/3 cup of milk
- 1¾ cups of heavy whipping cream
- 1/2 cup of confectioners’ sugar
- 3/4 cup of dry white cake mix (just the dry powder)
- One (8-ounce) package of cream cheese, softened
- 2/3 cup of granulated sugar
- 2 teaspoons of vanilla extract
- 3/4 cup of rainbow sprinkles
- Additional whipped cream and sprinkles for garnish (optional but recommended)
Instructions
- Prepare a 9″ round springform pan by lightly greasing the sides and bottom with cooking spray. Set it aside for later use.
- Using a stand mixer with the whisk attachment, beat the heavy whipping cream on HIGH power until soft peaks form, which should take around 4-5 minutes.
- Add in the confectioners’ sugar and dry cake mix powder to the whipped cream and continue beating until stiff peaks form, which usually takes about 2 minutes longer. Stir in the rainbow sprinkles gently.
- Transfer the whipped cream mixture into a medium bowl and set it aside momentarily.
- In the same stand mixer bowl, cream together the softened cream cheese, granulated sugar, and vanilla extract until the mixture is smooth and well blended, typically around 1 minute.
- Fold the whipped cream mixture back into the cream cheese mixture until there are no streaks remaining and the mixture is fluffy and fully combined.
- Spread approximately 1/4 cup of the mixture onto the bottom of the prepared springform pan to create a base layer for the Oreos.
- Dip each Oreo, one at a time, into the milk and layer them around the bottom of the pan, breaking Oreos if necessary to fit.
- Spread 1/3 of the mousse mixture over the Oreo layer using an offset spatula.
- Repeat the layering process with Oreos and mousse, creating alternating layers until you’ve used up all the ingredients, with the final layer being the remaining birthday cake mousse.
- Cover the springform pan with plastic wrap and refrigerate for at least 4-6 hours, or preferably overnight, to allow the cake to set.
- Just before serving, garnish the cake with additional whipped cream and rainbow sprinkles for an extra festive touch.
Notes
- Serving Suggestions: When serving the No-Bake Funfetti Oreo Icebox Cake, consider adding a dollop of whipped cream and an extra sprinkle of rainbow sprinkles on each slice for a delightful presentation. This adds a burst of flavor and enhances the visual appeal, making every serving feel like a celebration.
- Chilled Enjoyment: For the best texture and taste experience, serve the icebox cake chilled directly from the refrigerator. The cool, creamy layers combined with the crunchy Oreos create a refreshing and satisfying treat, especially on warm days or after a hearty meal.
- Portioning: To ensure neat and uniform slices, use a sharp knife dipped in warm water between cuts. This helps to glide through the layers smoothly, resulting in clean edges and beautifully plated servings.
- Storing Leftovers: If you happen to have any leftovers (which might be rare considering how delicious this cake is!), store them in an airtight container in the refrigerator. Properly stored, the cake can last for up to 2-3 days, maintaining its flavor and texture.
- Freezing Option: While this cake is best enjoyed fresh, you can also freeze individual slices for longer-term storage. Wrap each slice tightly in plastic wrap or aluminum foil before placing them in a freezer-safe container. Frozen slices can be kept for up to one month. When ready to enjoy, thaw the slices in the refrigerator overnight before serving.


