Description
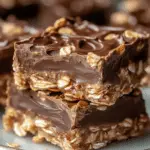
Looking for a simple and satisfying dessert? No Bake Chocolate Oat Bars are the answer! Packed with oats, chocolate, and peanut butter, these bars are a delightful treat for any occasion. Whether you’re craving a sweet snack or need a quick dessert to impress guests, this recipe is perfect.
Ingredients
- 1 cup butter
- ½ cup brown sugar, packed
- 1 teaspoon pure vanilla extract
- 3 cups rolled oats
- ½ teaspoon ground cinnamon
- ¼ teaspoon kosher salt
- 1 cup dark chocolate chips
- ¾ cup chunky peanut butter
Instructions
Follow these simple steps to whip up a batch of these irresistible bars:
- Prepare the Baking Dish: Line a 8-inch-by-8-inch baking dish with parchment paper and set it aside.
- Combine Butter and Sugar: In a medium saucepan, combine 1 cup butter, ½ cup brown sugar, and 1 teaspoon pure vanilla extract. Heat over low heat until the butter has melted and the sugar has dissolved.
- Add Oats and Spices: Stir in 3 cups rolled oats, ½ teaspoon ground cinnamon, and ¼ teaspoon kosher salt. Cook and stir constantly for 4 to 5 minutes until everything is well combined and fragrant.
- Layering the Bars: Pour half of the oat mixture into the prepared baking dish. Press it down evenly to form a solid base.
- Prepare the Chocolate Layer: In a small microwave-safe bowl, combine 1 cup dark chocolate chips and ¾ cup chunky peanut butter. Microwave in 40-second increments, stirring in between, until melted and smooth.
- Assemble the Bars: Pour ⅘ of the chocolate mixture over the pressed oats in the pan, reserving about ¼ cup for later. Spread it evenly to cover the oats.
- Final Touches: Top the chocolate layer with the remaining oats mixture. Drizzle the reserved chocolate mixture over the top for a decorative finish.
- Chill and Serve: Refrigerate the bars for at least 4 hours until firm and set. Once chilled, cut into squares and enjoy!
Notes
Serving Suggestions:
- Presentation: Cut the chilled bars into squares or rectangles for a neat presentation. Dust with powdered sugar or cocoa powder for an extra touch of elegance.
- Accompaniments: Serve with a scoop of vanilla ice cream or a dollop of whipped cream for a decadent dessert experience.
- Variations: Customize your bars by sprinkling chopped nuts, dried fruits, or shredded coconut over the top before chilling.
Storage Instructions:
- Refrigeration: Store leftover bars in an airtight container in the refrigerator for up to 1 week.
- Freezing: For longer storage, wrap individual bars tightly in plastic wrap and place them in a freezer-safe container. They can be frozen for up to 2 months.
- Thawing: Thaw frozen bars overnight in the refrigerator before serving. This helps maintain their texture and flavor.
Additional Tips:
- Room Temperature: If serving at room temperature, let the bars sit out for 10-15 minutes to soften slightly before serving.
- Travel-Friendly: These bars are perfect for picnics or road trips due to their sturdy texture and easy portability.

