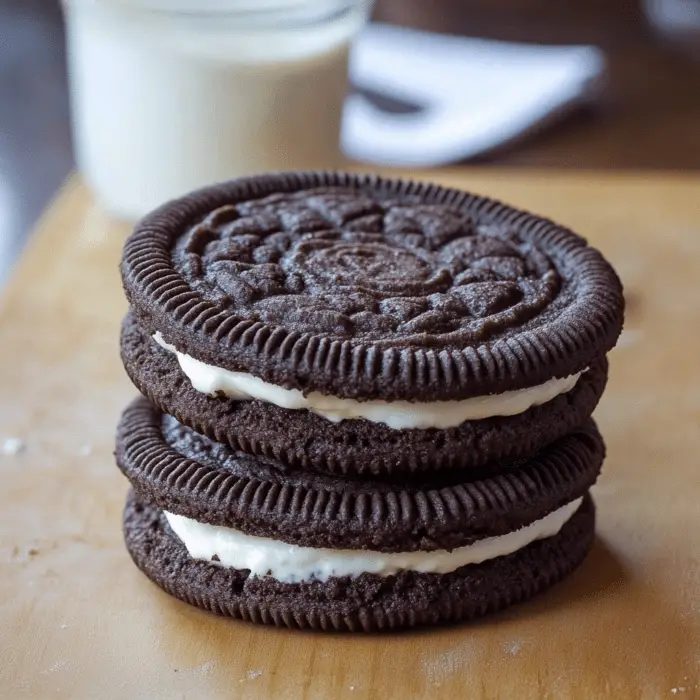
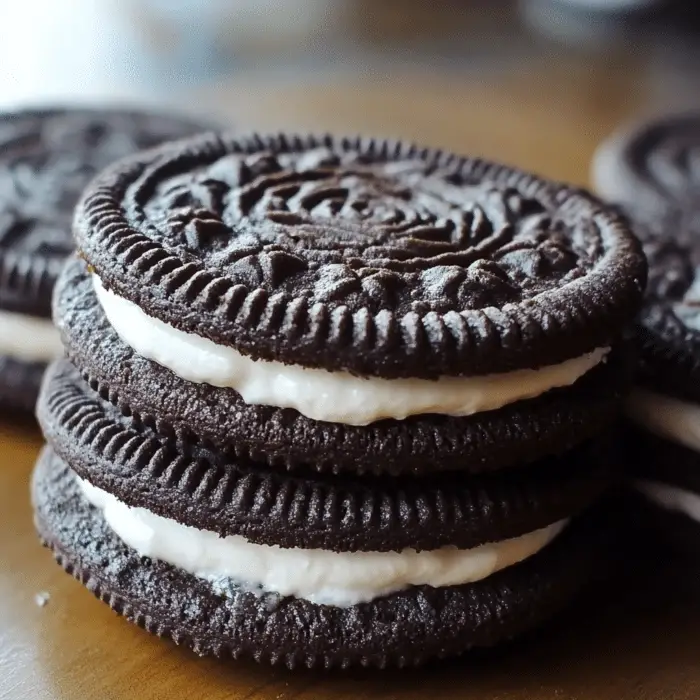
If you’re a fan of the classic Oreo cookie, you’ll love this easy recipe for homemade Oreos! With soft chocolate cookies and a creamy, sweet filling, these homemade cookies are a fun treat to make and share with family and friends. Whether you’re a seasoned baker or a beginner, this recipe requires simple ingredients and minimal time to create a delicious batch of homemade Oreos.

Ingredients
For the cookies:
- 1 15 oz box of Devil’s food cake mix
- ⅓ cup oil (canola or vegetable)
- 2 large eggs
For the filling:
- ⅓ cup butter (softened)
- 3 oz cream cheese
- 1.5-2 cups powdered sugar
- 1-2 tbsp cream or milk
Instructions
Chocolate Cookies
- Preheat your oven to 350°F (175°C). Line your cookie sheets with parchment paper or baking mats.
- In a large bowl, combine the cake mix, oil, and eggs. Use an electric mixer to beat the ingredients together until well combined.
- Roll the dough into balls, each about 1 tablespoon in size. Place the dough balls 2 inches apart on the prepared cookie sheets, then gently flatten each one in the center.
- Bake in the preheated oven for 8-10 minutes or until the tops of the cookies look set and firm.
- Allow the cookies to cool on the baking sheets for 5 minutes, then transfer them to a cooling rack to cool completely.
Filling
- In a medium bowl, beat together the softened butter and cream cheese until smooth and creamy.
- Gradually add the powdered sugar, about ½ cup at a time, until the desired sweetness is achieved.
- Stir in the cream or milk, one tablespoon at a time, until the filling reaches your preferred consistency.
- Spread the cream filling on the bottom side of one cookie, then sandwich it with another cookie. Repeat with the remaining cookies.
Prep and Bake Time
- Prep Time: 20 minutes
- Total Time: 45 minutes
- Servings: 12 cookies

Serving and Storage Tips
Serving Tips
- Chill Before Serving: For the best texture, refrigerate the assembled cookies for about 30 minutes before serving. This helps the filling set and gives the cookies a more firm, satisfying bite.
- Pairing Ideas: These homemade Oreos are perfect with a glass of cold milk, but you can also serve them with a cup of coffee or hot chocolate for an extra indulgent treat.
- Mini Serving Option: For a fun twist, cut the cookies in half to create mini homemade Oreos, perfect for smaller portions or parties.
Storage Tips
- Room Temperature: Store your homemade Oreos in an airtight container at room temperature for up to 5 days. Keep them in a cool, dry place to maintain freshness.
- Refrigeration: For longer freshness, store the cookies in the refrigerator for up to 1 week. Be sure to place a piece of parchment paper between layers of cookies to prevent them from sticking together.
- Freezing: You can freeze your homemade Oreos for up to 3 months. Wrap each cookie individually in plastic wrap, then place them in an airtight container or freezer bag. To enjoy, simply let them thaw at room temperature for about 15-20 minutes before serving.
By following these simple serving and storage tips, you can enjoy your homemade Oreos at their best for longer!
Variations
1. Red Velvet Oreos
For a festive twist, swap the Devil’s food cake mix with a red velvet cake mix. This will create vibrant red cookies with the same delicious taste. Pair with a cream cheese filling for a truly indulgent treat.
2. Mint Chocolate Oreos
Add a teaspoon of mint extract to the filling for a refreshing mint chocolate flavor. You can also add a few drops of green food coloring to make the filling look even more festive.
3. Peanut Butter Oreos
Incorporate peanut butter into the filling for a rich and nutty flavor. Use ½ cup of creamy peanut butter along with the butter and cream cheese for a delightful peanut butter Oreo variation. You could even top the filling with chopped peanuts for extra crunch.
4. Double Stuffed Oreos
For those who love an extra generous layer of filling, double the amount of filling you use between the cookies. This creates the perfect “double stuffed” Oreo experience at home.
5. Chocolate-Dipped Oreos
For a decadent finish, dip the edges of the baked cookies in melted chocolate (dark, milk, or white chocolate). Allow the chocolate to harden for a beautiful, glossy coating. You can also sprinkle crushed nuts, sprinkles, or sea salt on the chocolate coating for added texture and flavor.
6. S’mores Oreos
Add a toasted marshmallow flavor to your filling by mixing in marshmallow fluff, or use mini marshmallows in the filling. For extra s’mores flavor, sprinkle a little graham cracker crumbs between the cookie layers before adding the marshmallow filling.
7. Gluten-Free Oreos
For a gluten-free version, swap the Devil’s food cake mix with a gluten-free chocolate cake mix. Just make sure the other ingredients, like the powdered sugar and filling, are gluten-free as well. This variation allows those with gluten sensitivities to enjoy homemade Oreos.
8. Cookie Dough Oreos
Create a “cookie dough” filling by mixing in mini chocolate chips into the cream filling. This variation gives a chewy, delicious twist to the traditional Oreo.
9. Coconut Oreos
Add shredded coconut to the filling for a tropical flavor. You can also roll the edges of the finished cookies in extra coconut flakes for a delightful crunch and flavor boost.
These fun and creative variations can add a unique spin to your homemade Oreos, so feel free to experiment and make them your own!
FAQs
1. Can I use a different cake mix for the cookies?
Yes! While Devil’s food cake mix gives a rich chocolate flavor, you can use any chocolate cake mix or even other flavors like red velvet, vanilla, or spice cake mix for a unique twist.
2. Can I make the filling without cream cheese?
Yes, if you’re not a fan of cream cheese, you can substitute it with more butter or shortening. For a different flavor, try adding marshmallow fluff or a flavored frosting.
3. How can I make the cookies thinner?
If you prefer thinner cookies, flatten the dough more before baking. You can also reduce the baking time slightly to prevent them from becoming too firm.
4. Can I freeze the dough before baking?
Yes! You can freeze the cookie dough before baking. Roll the dough into balls and place them on a baking sheet. Freeze for about 30 minutes, then transfer the dough balls to a freezer bag for up to 3 months. Bake directly from frozen, adding a few extra minutes to the baking time.
5. How do I make my homemade Oreos crunchy?
To achieve a crunchier texture, bake the cookies a little longer or reduce the amount of oil in the recipe. Keep an eye on them so they don’t burn.
6. Can I make these cookies without eggs?
Yes! You can substitute the eggs with a flaxseed mixture (1 tablespoon flaxseed meal + 3 tablespoons water), or use a commercial egg replacer. This will work well for vegan or egg-free diets.
7. How do I store leftover homemade Oreos?
Store your homemade Oreos in an airtight container at room temperature for up to 5 days. For longer storage, you can refrigerate them for up to 1 week or freeze them for up to 3 months.
8. Can I make the filling ahead of time?
Absolutely! You can make the filling ahead of time and store it in an airtight container in the refrigerator for up to 2 days. Let it come to room temperature before using.
9. How do I know when the cookies are done baking?
The cookies are done when the tops look set, and the edges may begin to firm up. They will continue to cook slightly as they cool on the baking sheet, so be careful not to overbake.
10. Can I add other mix-ins to the cookie dough?
Yes! Feel free to add mini chocolate chips, nuts, or sprinkles to the dough for added flavor and texture. Just fold them into the dough before forming the cookie balls.
These frequently asked questions should help answer any concerns while making your homemade Oreos and ensure a delicious, stress-free baking experience!
These homemade Oreos are the perfect treat for anyone who loves a little nostalgia with a homemade twist. With their rich chocolate cookies and creamy filling, these cookies will quickly become a family favorite. Whether you enjoy them with a glass of milk or as an afternoon snack, these homemade Oreos are a fun and delicious way to recreate a beloved classic. Happy baking!
Print
Homemade Oreos
Description
If you’re a fan of the classic Oreo cookie, you’ll love this easy recipe for homemade Oreos! With soft chocolate cookies and a creamy, sweet filling, these homemade cookies are a fun treat to make and share with family and friends. Whether you’re a seasoned baker or a beginner, this recipe requires simple ingredients and minimal time to create a delicious batch of homemade Oreos.
Ingredients
For the cookies:
- 1 15 oz box of Devil’s food cake mix
- ⅓ cup oil (canola or vegetable)
- 2 large eggs
For the filling:
- ⅓ cup butter (softened)
- 3 oz cream cheese
- 1.5–2 cups powdered sugar
- 1–2 tbsp cream or milk
Instructions
Chocolate Cookies
- Preheat your oven to 350°F (175°C). Line your cookie sheets with parchment paper or baking mats.
- In a large bowl, combine the cake mix, oil, and eggs. Use an electric mixer to beat the ingredients together until well combined.
- Roll the dough into balls, each about 1 tablespoon in size. Place the dough balls 2 inches apart on the prepared cookie sheets, then gently flatten each one in the center.
- Bake in the preheated oven for 8-10 minutes or until the tops of the cookies look set and firm.
- Allow the cookies to cool on the baking sheets for 5 minutes, then transfer them to a cooling rack to cool completely.
Filling
- In a medium bowl, beat together the softened butter and cream cheese until smooth and creamy.
- Gradually add the powdered sugar, about ½ cup at a time, until the desired sweetness is achieved.
- Stir in the cream or milk, one tablespoon at a time, until the filling reaches your preferred consistency.
- Spread the cream filling on the bottom side of one cookie, then sandwich it with another cookie. Repeat with the remaining cookies.
Notes
Serving Tips
- Chill Before Serving: For the best texture, refrigerate the assembled cookies for about 30 minutes before serving. This helps the filling set and gives the cookies a more firm, satisfying bite.
- Pairing Ideas: These homemade Oreos are perfect with a glass of cold milk, but you can also serve them with a cup of coffee or hot chocolate for an extra indulgent treat.
- Mini Serving Option: For a fun twist, cut the cookies in half to create mini homemade Oreos, perfect for smaller portions or parties.
Storage Tips
- Room Temperature: Store your homemade Oreos in an airtight container at room temperature for up to 5 days. Keep them in a cool, dry place to maintain freshness.
- Refrigeration: For longer freshness, store the cookies in the refrigerator for up to 1 week. Be sure to place a piece of parchment paper between layers of cookies to prevent them from sticking together.
- Freezing: You can freeze your homemade Oreos for up to 3 months. Wrap each cookie individually in plastic wrap, then place them in an airtight container or freezer bag. To enjoy, simply let them thaw at room temperature for about 15-20 minutes before serving.
