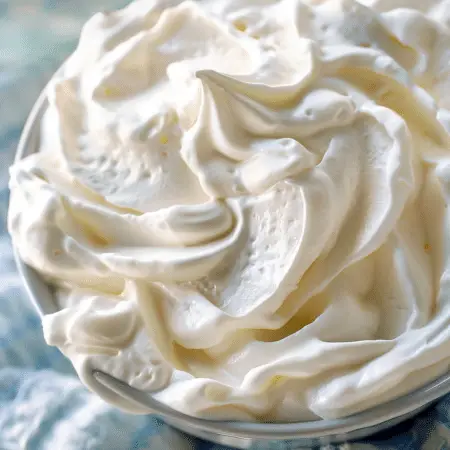
Delight in the rich, creamy goodness of homemade Cool Whip with this simple recipe. Made with just a handful of ingredients, this whipped topping is perfect for adding a delicious, fluffy touch to your favorite desserts. Unlike store-bought versions, this homemade recipe is free from preservatives and artificial flavors, ensuring a fresh and delightful taste every time.

Ingredients :
- 2 ¼ cups heavy whipping cream
- ¼ cup powdered sugar
- 1 tablespoon vanilla
- 2 teaspoons gelatin
- ½ cup cold water
Directions :
Step 1: Activate the Gelatin
Begin by sprinkling the gelatin over cold water in a bowl; stir and allow it to sit for 1-2 minutes until thickened. Then, microwave the mixture for 5-10 seconds until it liquifies. Set it aside to cool.
Step 2: Whip Up the Cream
In a large chilled mixing bowl, combine the heavy cream, powdered sugar, and vanilla. Mix on low speed using the whisk attachment until small bubbles cover the surface. Increase the speed to medium and continue mixing until the mixture becomes visibly thicker.
Step 3: Incorporate the Gelatin
While the mixer is still running, slowly add the gelatin mixture. Increase the speed to high and mix until medium peaks form. Your homemade Cool Whip is now ready to use immediately or store in an airtight container for later.
Quick and Easy Preparation
Prep Time: 10 minutes
Total Time: 10 minutes
Servings: 4

Serving and Storage Tips :
Serving Suggestions
1. Dollop on Desserts: Serve your homemade Cool Whip atop pies, cakes, fruit salads, or ice cream for a creamy and indulgent touch.
2. Frosting Substitute: Use it as a frosting alternative for cakes and cupcakes, spreading it smoothly over the surface for a light and airy finish.
3. Dip Accompaniment: Pair it with cookies, strawberries, or other dippable treats for a delightful dessert dip.
4. Hot Cocoa Topper: Add a dollop to your hot cocoa or coffee for a luscious, creamy finish.
Storage Tips
1. Airtight Container: Store any leftover Cool Whip in an airtight container to maintain its freshness and prevent it from absorbing other odors in the refrigerator.
2. Refrigeration: Homemade Cool Whip should be stored in the refrigerator to keep it chilled and maintain its consistency. It can last for up to 3-4 days when properly stored.
3. Freezing: While homemade Cool Whip can be frozen, its texture may change slightly upon thawing. If freezing, transfer it to a freezer-safe container and use it within 1-2 months for the best results.
4. Re-Whipping: If your Cool Whip appears slightly deflated after storage, you can re-whip it briefly with a hand mixer to restore its fluffy texture before serving.
5. Avoid Over-Beating: Be cautious not to over-beat the Cool Whip during preparation, as this can cause it to become grainy or lose its smooth texture.
6. Gelatin Stability: The addition of gelatin helps stabilize the Cool Whip, ensuring it maintains its shape and consistency over time. However, avoid overheating the gelatin mixture or adding it too quickly to prevent lumps from forming.
7. Serve Chilled: For the best taste and texture, serve your homemade Cool Whip chilled, straight from the refrigerator.
By following these serving and storage tips, you can ensure that your homemade Cool Whip remains fresh, fluffy, and delicious for all your dessert needs. Enjoy its creamy goodness with every spoonful! 🍰🥄
Variations :
1. Chocolate Cool Whip: Incorporate cocoa powder or melted chocolate into the whipped cream mixture for a rich chocolatey flavor.
2. Mint Cool Whip: Add a few drops of peppermint extract or finely chopped fresh mint leaves to the whipped cream for a refreshing twist.
3. Coconut Cool Whip: Fold in shredded coconut or coconut extract to the whipped cream for a tropical flavor boost.
4. Lemon Cool Whip: Mix in lemon zest and a splash of lemon juice for a tangy and citrusy Cool Whip variation.
5. Berry Cool Whip: Fold in mashed or pureed berries such as strawberries, raspberries, or blueberries to add natural sweetness and fruity flavor.
6. Espresso Cool Whip: Dissolve instant espresso powder in a small amount of hot water, then fold it into the whipped cream mixture for a coffee-infused Cool Whip.
7. Maple Cool Whip: Substitute some of the powdered sugar with maple syrup for a delightful maple flavor.
8. Almond Cool Whip: Add almond extract or finely chopped almonds to the whipped cream for a nutty and aromatic variation.
9. Cinnamon Spice Cool Whip: Mix in ground cinnamon and a pinch of nutmeg or cloves for a warm and comforting Cool Whip flavor.
10. Honey Vanilla Cool Whip: Drizzle honey over the whipped cream and add a splash of vanilla extract for a sweet and fragrant variation.
11. Peanut Butter Cool Whip: Swirl in creamy peanut butter for a nutty and decadent twist on classic Cool Whip.
12. Salted Caramel Cool Whip: Drizzle homemade or store-bought salted caramel sauce into the whipped cream for a sweet and salty flavor combination.
FAQs:
1. Can I use regular sugar instead of powdered sugar?
Powdered sugar is preferred as it dissolves more easily and helps create a smoother texture, but you can use regular sugar if necessary. Just be sure to mix it thoroughly to avoid any graininess.
2. Can I make Cool Whip without gelatin?
While gelatin helps stabilize the whipped cream, you can omit it if desired. However, the Cool Whip may not hold its shape as well and may be prone to deflating over time.
3. Can I use non-dairy creamer instead of heavy whipping cream?
Non-dairy creamer may not whip up as well as heavy whipping cream and may not provide the same creamy texture. It’s best to stick with heavy whipping cream for optimal results.
4. Can I sweeten Cool Whip with honey or maple syrup?
Yes, you can use honey or maple syrup as sweeteners in place of powdered sugar. Adjust the amount to taste, keeping in mind that liquid sweeteners may alter the texture slightly.
5. How can I make Cool Whip dairy-free?
You can use a non-dairy alternative such as coconut cream or a whipped topping made from soy or almond milk as a substitute for heavy whipping cream to make dairy-free Cool Whip.
6. Can I flavor Cool Whip with extracts?
Yes, extracts such as almond, coconut, peppermint, or any other flavoring can be added to customize the taste of your Cool Whip.
7. How long will homemade Cool Whip last in the refrigerator?
Homemade Cool Whip can typically be stored in the refrigerator for 3-4 days. Be sure to keep it tightly covered to prevent it from absorbing other odors.
8. Can I freeze homemade Cool Whip?
Yes, homemade Cool Whip can be frozen, but its texture may change slightly upon thawing. Freeze it in an airtight container for up to 1-2 months for best results.
9. How can I fix over-whipped Cool Whip?
If your Cool Whip becomes over-whipped and starts to separate, gently fold in a small amount of fresh whipped cream to help restore its texture.
10. Can I use homemade Cool Whip as a frosting for cakes?
Yes, homemade Cool Whip can be used as a frosting alternative for cakes and cupcakes. Just be sure to keep the frosted dessert refrigerated until serving to maintain its consistency.
Whether you’re topping off a slice of pie, dolloping it onto a bowl of fresh fruit, or using it to garnish your favorite dessert, homemade Cool Whip adds a luxurious touch to any treat. Plus, knowing that it’s made with simple, wholesome ingredients makes it all the more satisfying. Try it out and elevate your desserts to the next level! 🍰🥄
Print
Homemade Cool Whip
Description
Delight in the rich, creamy goodness of homemade Cool Whip with this simple recipe. Made with just a handful of ingredients, this whipped topping is perfect for adding a delicious, fluffy touch to your favorite desserts. Unlike store-bought versions, this homemade recipe is free from preservatives and artificial flavors, ensuring a fresh and delightful taste every time.
Ingredients
- 2 ¼ cups heavy whipping cream
- ¼ cup powdered sugar
- 1 tablespoon vanilla
- 2 teaspoons gelatin
- ½ cup cold water
Instructions
Step 1: Activate the Gelatin
Begin by sprinkling the gelatin over cold water in a bowl; stir and allow it to sit for 1-2 minutes until thickened. Then, microwave the mixture for 5-10 seconds until it liquifies. Set it aside to cool.
Step 2: Whip Up the Cream
In a large chilled mixing bowl, combine the heavy cream, powdered sugar, and vanilla. Mix on low speed using the whisk attachment until small bubbles cover the surface. Increase the speed to medium and continue mixing until the mixture becomes visibly thicker.
Step 3: Incorporate the Gelatin
While the mixer is still running, slowly add the gelatin mixture. Increase the speed to high and mix until medium peaks form. Your homemade Cool Whip is now ready to use immediately or store in an airtight container for later.
Quick and Easy Preparation
Prep Time: 10 minutes
Total Time: 10 minutes
Servings: 4
Notes
Serving Suggestions
1. Dollop on Desserts: Serve your homemade Cool Whip atop pies, cakes, fruit salads, or ice cream for a creamy and indulgent touch.
2. Frosting Substitute: Use it as a frosting alternative for cakes and cupcakes, spreading it smoothly over the surface for a light and airy finish.
3. Dip Accompaniment: Pair it with cookies, strawberries, or other dippable treats for a delightful dessert dip.
4. Hot Cocoa Topper: Add a dollop to your hot cocoa or coffee for a luscious, creamy finish.
Storage Tips
1. Airtight Container: Store any leftover Cool Whip in an airtight container to maintain its freshness and prevent it from absorbing other odors in the refrigerator.
2. Refrigeration: Homemade Cool Whip should be stored in the refrigerator to keep it chilled and maintain its consistency. It can last for up to 3-4 days when properly stored.
3. Freezing: While homemade Cool Whip can be frozen, its texture may change slightly upon thawing. If freezing, transfer it to a freezer-safe container and use it within 1-2 months for the best results.
4. Re-Whipping: If your Cool Whip appears slightly deflated after storage, you can re-whip it briefly with a hand mixer to restore its fluffy texture before serving.
5. Avoid Over-Beating: Be cautious not to over-beat the Cool Whip during preparation, as this can cause it to become grainy or lose its smooth texture.
6. Gelatin Stability: The addition of gelatin helps stabilize the Cool Whip, ensuring it maintains its shape and consistency over time. However, avoid overheating the gelatin mixture or adding it too quickly to prevent lumps from forming.
7. Serve Chilled: For the best taste and texture, serve your homemade Cool Whip chilled, straight from the refrigerator.
By following these serving and storage tips, you can ensure that your homemade Cool Whip remains fresh, fluffy, and delicious for all your dessert needs. Enjoy its creamy goodness with every spoonful! 🍰🥄
