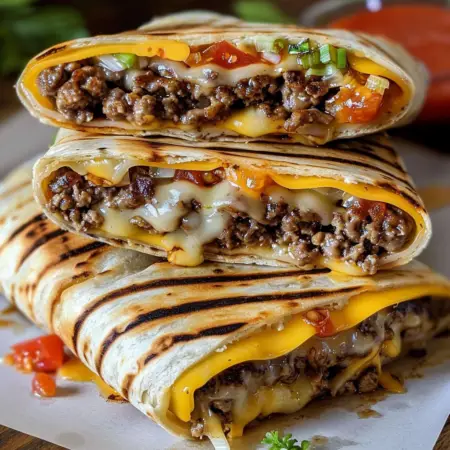
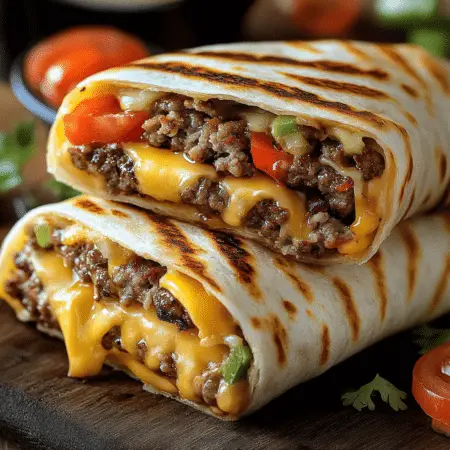
Looking for a delicious twist on a classic cheeseburger? Try these Grilled Cheeseburger Wraps! They combine all your favorite burger flavors in a convenient, handheld wrap. Perfect for a quick dinner or a fun meal with friends and family. Here’s how to make them.

Ingredients:
- 1 pound ground beef
- Salt and pepper, to taste
- 4 large flour tortillas
- 1 cup shredded cheddar cheese
- 1 cup shredded lettuce
- 1 cup diced tomatoes
- 1/2 cup diced onions
- Ketchup, mustard, and pickles, for serving (optional)
Directions:
1. Cook the Beef: In a skillet over medium heat, cook the ground beef until browned and cooked through. Season with salt and pepper to taste.
2. Drain and Set Aside: Drain any excess grease from the skillet and set the cooked beef aside.
3. Prepare the Tortilla: Place a flour tortilla on a clean work surface. Spoon some of the cooked ground beef onto the center of the tortilla.
4. Add Toppings: Top the beef with shredded cheddar cheese, shredded lettuce, diced tomatoes, and diced onions. If desired, add a drizzle of ketchup and mustard and a few pickle slices on top of the filling.
5. Roll the Wrap: Fold the sides of the tortilla over the filling, then roll it up tightly to form a wrap. Repeat the process with the remaining tortillas and filling.
6. Grill the Wraps: Heat a large skillet or grill pan over medium heat. Place the wraps seam-side down on the skillet or grill pan. Cook the wraps for 2-3 minutes on each side, or until golden brown and crispy.
7. Serve: Remove the wraps from the skillet and let them cool slightly before slicing in half. Serve the grilled cheeseburger wraps warm with additional ketchup, mustard, and pickles on the side, if desired.
Tips:
- Customize the Filling: Add your favorite cheese, vegetables, or condiments to make these wraps your own.
- Outdoor Grilling: For extra flavor, grill the wraps on an outdoor grill instead of using a skillet.
- Vegetarian Option: Make a vegetarian version by substituting the ground beef with cooked black beans or grilled vegetables.

Enjoy your Grilled Cheeseburger Wraps with your favorite sides and condiments. This recipe is sure to be a hit with everyone!
Print
Grilled Cheeseburger Wraps
Description
Looking for a delicious twist on a classic cheeseburger? Try these Grilled Cheeseburger Wraps! They combine all your favorite burger flavors in a convenient, handheld wrap. Perfect for a quick dinner or a fun meal with friends and family. Here’s how to make them.
Ingredients
- 1 pound ground beef
- Salt and pepper, to taste
- 4 large flour tortillas
- 1 cup shredded cheddar cheese
- 1 cup shredded lettuce
- 1 cup diced tomatoes
- 1/2 cup diced onions
- Ketchup, mustard, and pickles, for serving (optional)
Instructions
1. Cook the Beef: In a skillet over medium heat, cook the ground beef until browned and cooked through. Season with salt and pepper to taste.
2. Drain and Set Aside: Drain any excess grease from the skillet and set the cooked beef aside.
3. Prepare the Tortilla: Place a flour tortilla on a clean work surface. Spoon some of the cooked ground beef onto the center of the tortilla.
4. Add Toppings: Top the beef with shredded cheddar cheese, shredded lettuce, diced tomatoes, and diced onions. If desired, add a drizzle of ketchup and mustard and a few pickle slices on top of the filling.
5. Roll the Wrap: Fold the sides of the tortilla over the filling, then roll it up tightly to form a wrap. Repeat the process with the remaining tortillas and filling.
6. Grill the Wraps: Heat a large skillet or grill pan over medium heat. Place the wraps seam-side down on the skillet or grill pan. Cook the wraps for 2-3 minutes on each side, or until golden brown and crispy.
7. Serve: Remove the wraps from the skillet and let them cool slightly before slicing in half. Serve the grilled cheeseburger wraps warm with additional ketchup, mustard, and pickles on the side, if desired.
Tips:
- Customize the Filling: Add your favorite cheese, vegetables, or condiments to make these wraps your own.
- Outdoor Grilling: For extra flavor, grill the wraps on an outdoor grill instead of using a skillet.
- Vegetarian Option: Make a vegetarian version by substituting the ground beef with cooked black beans or grilled vegetables.
Notes
Serving Suggestions:
- Side Dishes: Pair your Grilled Cheeseburger Wraps with classic sides like French fries, onion rings, or a fresh green salad for a complete meal.
- Dipping Sauces: Offer a variety of dipping sauces such as ranch, barbecue sauce, or spicy mayo to enhance the flavor of the wraps.
- Garnish: Garnish the wraps with fresh herbs like chopped parsley or cilantro for added color and flavor.
- Beverages: Serve with cold beverages like iced tea, lemonade, or a refreshing soda to complement the savory wraps.
Storage Tips:
- Refrigeration: If you have any leftovers, wrap them tightly in aluminum foil or plastic wrap and store them in an airtight container in the refrigerator. They will stay fresh for up to 3 days.
- Freezing: For longer storage, you can freeze the wraps. Wrap each one individually in plastic wrap and then place them in a freezer-safe bag or container. They can be frozen for up to 2 months.
- Reheating: To reheat, unwrap the frozen wraps and place them on a baking sheet. Cover with aluminum foil and bake in a preheated oven at 350°F (175°C) for about 20-25 minutes, or until heated through. You can also reheat them in a skillet over medium heat until warmed and crispy.
- Microwave Option: For a quick reheat, you can use the microwave. Place the wrap on a microwave-safe plate and cover it with a damp paper towel. Microwave on high for 1-2 minutes, or until heated through. Note that the wrap may not be as crispy as when reheated in the oven or skillet.
By following these serving and storage tips, you can enjoy your Grilled Cheeseburger Wraps fresh and delicious anytime!
