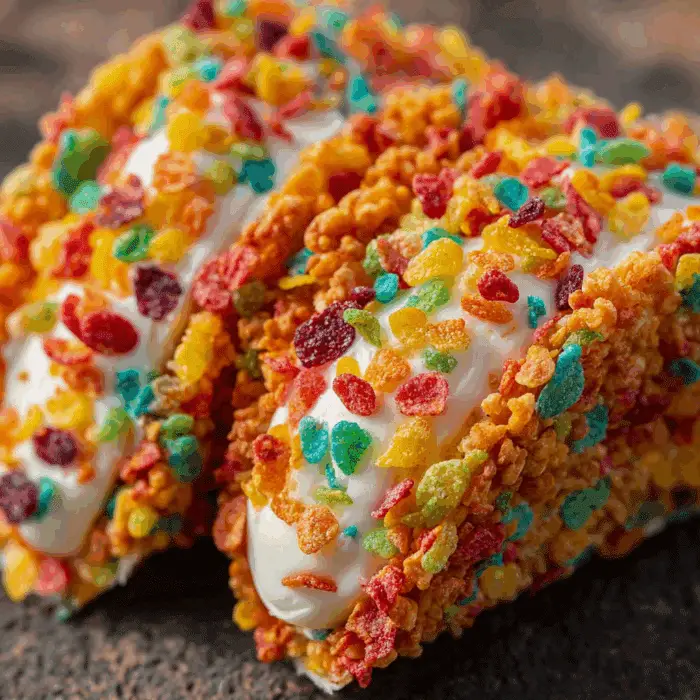
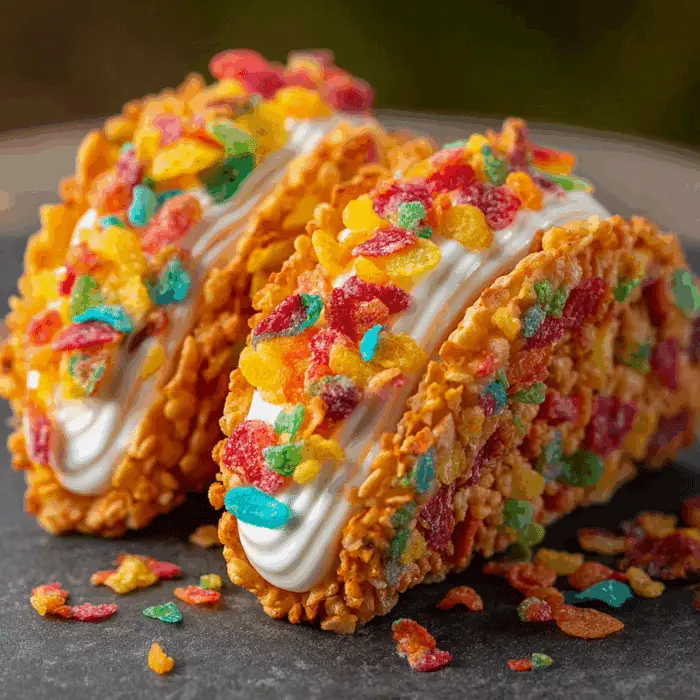
Looking for a playful and indulgent dessert that will brighten any table? These Fruity Pebbles Cheesecake Tacos are bursting with color, crunch, and creamy goodness. Perfect for birthday parties, family gatherings, or just a whimsical weekend treat, this no-bake recipe transforms nostalgic cereal into a vibrant taco shell, filled with smooth and fluffy cheesecake filling. It’s a simple, crowd-pleasing dessert that kids and adults will love.

Ingredients
To make this delightful treat, you’ll need the following ingredients:
3 cups fruity cereal
1/2 cup unsalted butter, melted
8 oz cream cheese, softened to room temperature
1/2 cup powdered sugar, sifted
1 tsp pure vanilla extract
1 cup whipped cream
Instructions
- Prepare the taco shells by combining the fruity cereal and melted butter in a bowl. Mix until the cereal is fully coated.
- Press the mixture firmly into the shape of taco shells using the back of a spoon and a taco mold or the curved side of a muffin pan. Let them set in the refrigerator until firm, about 30 minutes.
- While the shells are chilling, beat the softened cream cheese until smooth using a hand mixer or stand mixer.
- Add the powdered sugar and vanilla extract to the cream cheese and continue beating until fully combined and creamy.
- Fold in the whipped cream gently until the filling is light and fluffy.
- Once the cereal shells are firm, carefully remove them from the molds.
- Spoon or pipe the cheesecake filling into each taco shell.
- Chill the assembled tacos for at least 1 hour before serving to allow the filling to set.

Serving and Storage Tips
Serve Fruity Pebbles Cheesecake Tacos chilled straight from the fridge for the best texture and flavor. For added flair, top them with extra whipped cream, a sprinkle of Fruity Pebbles, or a light drizzle of white chocolate just before serving. These treats are perfect for parties, dessert tables, or anytime you want to impress with minimal effort.
To store, place the assembled tacos in a single layer in an airtight container and refrigerate for up to 3 days. If you’re making them ahead, it’s best to store the cereal shells and cheesecake filling separately, then assemble just before serving to keep the shells crisp. Freezing is not recommended, as the cereal can become soggy and lose its crunch.
Variations
Chocolate Lovers’ Delight
Swap Fruity Pebbles with Cocoa Pebbles to create a chocolate version of this dessert. You can also add 1–2 tablespoons of cocoa powder to the cheesecake filling for an extra chocolate punch. Top with mini chocolate chips for even more indulgence.
Berry Cheesecake Tacos
Mix chopped fresh strawberries, blueberries, or raspberries into the cheesecake filling for a burst of real fruit flavor. The berries pair beautifully with the tangy cream cheese and vibrant cereal shells, creating a refreshing twist.
Tropical Dream
Add crushed pineapple or mango chunks to the filling, and swap the vanilla extract for coconut extract. This variation delivers a tropical, island-inspired flavor that’s perfect for summer parties and BBQs.
Mini Cheesecake Tacos
Use mini muffin tins or smaller molds to make bite-sized versions of the tacos. They’re ideal for parties, potlucks, or kids’ snacks. Adjust the chill time slightly, as smaller tacos will firm up faster.
Birthday Cake Fun
Add 1/2 teaspoon of almond extract to the filling and fold in colorful sprinkles. Top with extra whipped cream and more sprinkles for a festive, birthday-cake-inspired dessert.
Lemon Cheesecake Tacos
Replace vanilla extract with fresh lemon juice and a bit of lemon zest in the filling for a bright, citrusy flavor. This variation is light, tangy, and perfect for spring and summer celebrations.
FAQs
1. Can I make Fruity Pebbles Cheesecake Tacos ahead of time?
Yes, you can make the shells and filling a day in advance. Store the shells in an airtight container at room temperature and the filling in the refrigerator. Assemble right before serving for best texture.
2. How do I keep the cereal taco shells from getting soggy?
Make sure the shells are well chilled and firm before filling. Also, assemble the tacos close to serving time to preserve the crispiness of the cereal.
3. Can I use a different type of cereal?
Absolutely. Cocoa Pebbles, Rice Krispies, or Trix can all be used to create unique versions of the taco shells.
4. Is there a way to make this recipe dairy-free?
Yes. Use dairy-free cream cheese, dairy-free whipped topping, and plant-based butter alternatives to make a dairy-free version.
5. Can I freeze the cheesecake tacos?
Freezing is not recommended because the cereal shells may become soggy and lose their crunchy texture once thawed.
6. What can I use instead of a taco mold?
You can drape the cereal mixture over the rounded side of a muffin tin or a rolling pin wrapped in parchment paper to create the taco shape.
7. Can I use store-bought whipped topping instead of homemade whipped cream?
Yes, store-bought whipped topping like Cool Whip works well and helps save time.
8. How long should the shells chill in the fridge?
Chill the cereal shells for at least 30 minutes or until they are firm enough to hold their shape when removed from the mold.
9. What’s the best way to pipe the cheesecake filling into the shells?
Use a piping bag or a resealable plastic bag with the corner snipped off for easy and clean filling of the taco shells.
10. Can I add toppings to the cheesecake tacos?
Definitely. Top with extra Fruity Pebbles, whipped cream, fresh fruit, chocolate drizzle, or sprinkles for added fun and flavor.
Fruity Pebbles Cheesecake Tacos are more than just eye-catching—they’re an explosion of flavor and texture in every bite. Easy to make and even easier to love, this fun dessert is perfect for those who enjoy combining childhood favorites with creamy cheesecake filling. Whether you’re hosting a party or simply indulging your sweet tooth, these tacos are a whimsical addition to any dessert lineup.
Print
Fruity Pebbles Cheesecake Tacos
Description
Looking for a playful and indulgent dessert that will brighten any table? These Fruity Pebbles Cheesecake Tacos are bursting with color, crunch, and creamy goodness. Perfect for birthday parties, family gatherings, or just a whimsical weekend treat, this no-bake recipe transforms nostalgic cereal into a vibrant taco shell, filled with smooth and fluffy cheesecake filling. It’s a simple, crowd-pleasing dessert that kids and adults will love.
Ingredients
3 cups fruity cereal
1/2 cup unsalted butter, melted
8 oz cream cheese, softened to room temperature
1/2 cup powdered sugar, sifted
1 tsp pure vanilla extract
1 cup whipped cream
Instructions
-
Prepare the taco shells by combining the fruity cereal and melted butter in a bowl. Mix until the cereal is fully coated.
-
Press the mixture firmly into the shape of taco shells using the back of a spoon and a taco mold or the curved side of a muffin pan. Let them set in the refrigerator until firm, about 30 minutes.
-
While the shells are chilling, beat the softened cream cheese until smooth using a hand mixer or stand mixer.
-
Add the powdered sugar and vanilla extract to the cream cheese and continue beating until fully combined and creamy.
-
Fold in the whipped cream gently until the filling is light and fluffy.
-
Once the cereal shells are firm, carefully remove them from the molds.
-
Spoon or pipe the cheesecake filling into each taco shell.
-
Chill the assembled tacos for at least 1 hour before serving to allow the filling to set.
Notes
Serve Fruity Pebbles Cheesecake Tacos chilled straight from the fridge for the best texture and flavor. For added flair, top them with extra whipped cream, a sprinkle of Fruity Pebbles, or a light drizzle of white chocolate just before serving. These treats are perfect for parties, dessert tables, or anytime you want to impress with minimal effort.
To store, place the assembled tacos in a single layer in an airtight container and refrigerate for up to 3 days. If you’re making them ahead, it’s best to store the cereal shells and cheesecake filling separately, then assemble just before serving to keep the shells crisp. Freezing is not recommended, as the cereal can become soggy and lose its crunch.