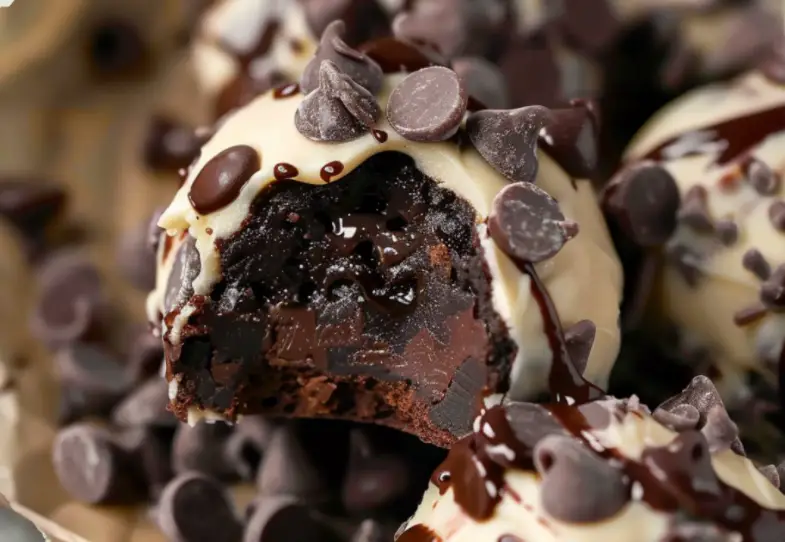
In the world of desserts, there are few things more tantalizing than the combination of chocolate chip cookies and brownies. Now, imagine the decadence of these two classics merged into one irresistible bite-sized treat. That’s exactly what you get with Chocolate Chip Cookie Dough Brownie Bombs—a heavenly dessert that promises to be a crowd-pleaser at any gathering or a luxurious treat for those moments when you need a sweet escape. Let’s dive into the recipe that’s set to elevate your baking game.

Ingredients
¾ cup butter, softened
¾ cup brown sugar
¼ cup white sugar
2 Tbsp milk
1 tsp vanilla extract
2 cups all-purpose flour
Pinch salt
2 cups miniature chocolate chips, divided
1 pkg fudge brownie mix, baked and cooled
1 pkg Candiquik or chocolate almond bark
Directions
- Start with the Dough: In a stand mixer, cream together butter and sugars until smooth. This base is crucial for the texture of your cookie dough. Blend in milk and vanilla for flavor, then gradually mix in flour and a pinch of salt. Once a soft dough forms, stir in 1 cup of the mini chocolate chips. This dough will be the heart of your brownie bombs.
- Shape and Chill: On a foil-lined baking sheet, form scant tablespoon-sized balls of dough. The size is perfect for ensuring a balance between cookie dough and brownie in each bomb. Freeze for 1 hour to firm up.
- Wrap with Brownies: Cut your baked and cooled brownies into 1″ squares. Flatten each square slightly, place a dough ball in the center, and carefully wrap the brownie around the dough. This step is where the magic happens, encasing the cookie dough in a brownie shell. Freeze the wrapped balls for an additional 30 minutes.
- Coat in Chocolate: Melt your Candiquik or chocolate almond bark as directed. Dip each bomb into the chocolate, allowing the excess to drip off before placing it back on the foil. This chocolate shell not only adds an extra layer of chocolate goodness but also seals in the flavors. Sprinkle the still-wet chocolate bombs with the remaining chocolate chips for a decorative and delicious touch.
- Chill Until Set: Let the chocolate set by chilling the bombs. Once solid, your Chocolate Chip Cookie Dough Brownie Bombs are ready to serve. They can be stored in an airtight container in the fridge or freezer, ready to satisfy your sweet tooth on demand.
Prep & Cooking Time:
- Preparation Time: About 1 hour and 30 minutes, including freezing times.
- Cooking Time: 30 minutes for the brownies if not using pre-made.
- Total Time: 2 hours, a small investment for a big return in flavor.
- Calories: Approximately 300 kcal per bomb, making it a rich treat.
- Servings: 15-18 bombs, perfect for sharing or savoring over time.

Whether you’re a seasoned baker or new to the kitchen, these Chocolate Chip Cookie Dough Brownie Bombs are sure to impress. With their rich, fudgy brownie exterior, sweet cookie dough center, and a smooth chocolate coating, they’re the epitome of dessert perfection. So why wait? Dive into this recipe and treat yourself and your loved ones to something truly special. Happy baking!
Print
Chocolate Chip Cookie Dough Brownie Bombs
Description
In the world of desserts, there are few things more tantalizing than the combination of chocolate chip cookies and brownies. Now, imagine the decadence of these two classics merged into one irresistible bite-sized treat. That’s exactly what you get with Chocolate Chip Cookie Dough Brownie Bombs—a heavenly dessert that promises to be a crowd-pleaser at any gathering or a luxurious treat for those moments when you need a sweet escape. Let’s dive into the recipe that’s set to elevate your baking game.
Ingredients
- Butter: ¾ cup, softened to ensure your dough is perfectly moist.
- Sugars: A mix of ¾ cup brown sugar for that deep molasses flavor and ¼ cup white sugar for sweetness.
- Milk & Vanilla Extract: 2 tablespoons of milk and 1 teaspoon of vanilla extract to add richness and depth.
- All-Purpose Flour: 2 cups to form the dough’s base.
- Salt: Just a pinch to balance the sweetness.
- Chocolate Chips: 2 cups of miniature chocolate chips, divided for dough and decoration.
- Brownie Mix: 1 package, baked and cooled. This is your bomb’s decadent shell.
- Candiquik or Chocolate Almond Bark: 1 package for a smooth, chocolatey coating.
Instructions
- Start with the Dough: In a stand mixer, cream together butter and sugars until smooth. This base is crucial for the texture of your cookie dough. Blend in milk and vanilla for flavor, then gradually mix in flour and a pinch of salt. Once a soft dough forms, stir in 1 cup of the mini chocolate chips. This dough will be the heart of your brownie bombs.
- Shape and Chill: On a foil-lined baking sheet, form scant tablespoon-sized balls of dough. The size is perfect for ensuring a balance between cookie dough and brownie in each bomb. Freeze for 1 hour to firm up.
- Wrap with Brownies: Cut your baked and cooled brownies into 1″ squares. Flatten each square slightly, place a dough ball in the center, and carefully wrap the brownie around the dough. This step is where the magic happens, encasing the cookie dough in a brownie shell. Freeze the wrapped balls for an additional 30 minutes.
- Coat in Chocolate: Melt your Candiquik or chocolate almond bark as directed. Dip each bomb into the chocolate, allowing the excess to drip off before placing it back on the foil. This chocolate shell not only adds an extra layer of chocolate goodness but also seals in the flavors. Sprinkle the still-wet chocolate bombs with the remaining chocolate chips for a decorative and delicious touch.
- Chill Until Set: Let the chocolate set by chilling the bombs. Once solid, your Chocolate Chip Cookie Dough Brownie Bombs are ready to serve. They can be stored in an airtight container in the fridge or freezer, ready to satisfy your sweet tooth on demand.
Prep & Cooking Time:
- Preparation Time: About 1 hour and 30 minutes, including freezing times.
- Cooking Time: 30 minutes for the brownies if not using pre-made.
- Total Time: 2 hours, a small investment for a big return in flavor.
- Calories: Approximately 300 kcal per bomb, making it a rich treat.
- Servings: 15-18 bombs, perfect for sharing or savoring over time.
Notes
Serving Tips:
- Bring to Room Temperature: If you’ve stored the bombs in the refrigerator or freezer, it’s a good idea to let them sit out for a few minutes before serving. This slight return to room temperature ensures the flavors are not muted and the texture is perfect.
- Pair with Beverages: These chocolatey delights pair wonderfully with a range of beverages. Serve them with a glass of cold milk, a cup of hot coffee, or even a glass of red wine for a truly indulgent experience.
- Plating for Presentation: For a special touch, place each bomb in a mini cupcake liner. Dusting a little powdered sugar or drizzling with caramel or more melted chocolate right before serving can also elevate the presentation and add another layer of flavor.
- Serve as Dessert or a Snack: While they make for an impressive end to any meal, these bombs are also perfect as a mid-afternoon pick-me-up. Their size makes them easy to serve as part of a dessert buffet or packaged as a thoughtful homemade gift.
Storage Tips:
- Airtight Container: Store these treats in an airtight container. This will prevent them from absorbing odors from the fridge and from drying out.
- Refrigeration: Due to the butter and milk in the cookie dough, it’s best to store these bombs in the refrigerator. They will keep well for up to a week.
- Freezing for Longevity: For longer storage, freeze the bombs on a baking sheet until solid, then transfer to a freezer-safe bag or container. They can be stored this way for up to 3 months. Thaw in the refrigerator or at room temperature when you’re ready to enjoy them.
- Avoiding Condensation: If you’re storing them in the freezer, try to let them thaw gradually in the refrigerator to avoid condensation, which could make the outer chocolate coating less crisp.
