Cherry Pie Bombs

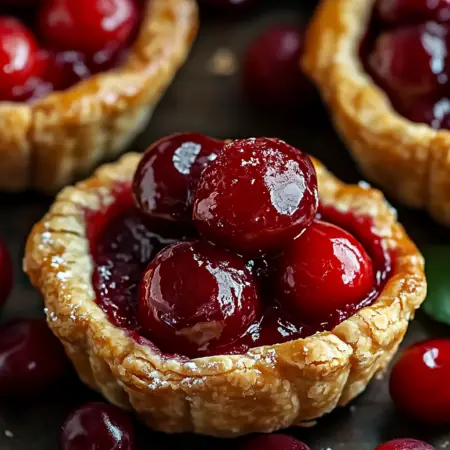
Indulge in a delightful dessert experience with our Cherry Pie Bombs recipe! These delectable treats are crafted with the perfect combination of canned biscuits and luscious cherry pie filling. Whether you opt to bake them in the oven or air-fry them to golden perfection, they promise a crispy exterior and a warm, gooey interior that will leave your taste buds craving for more. Impress your guests or treat yourself to a sweet delight in just a matter of minutes!
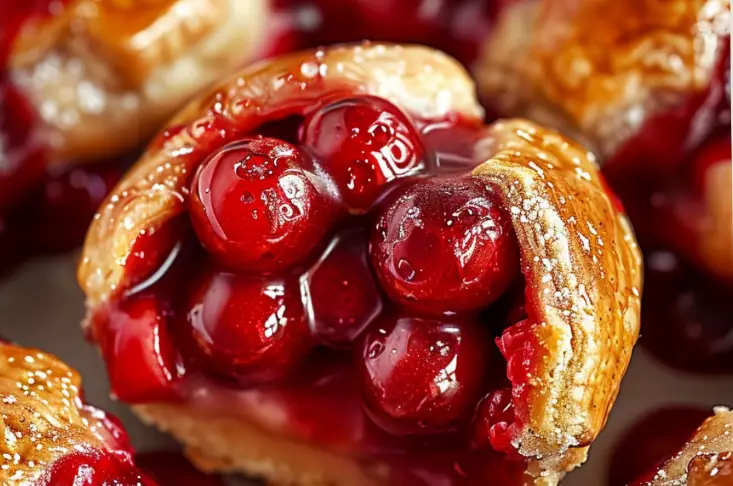
Ingredients:

  • 1 can (8-count) Grand biscuits (not flaky layers or crescent roll dough)
  • 1 cup cherry pie filling
  • ½ cup (1 stick) unsalted butter, melted
  • ½ cup cinnamon/sugar blend

Directions:

  1. Begin by separating the biscuits into two layers and placing them on a clean surface.
  2. Using a rolling pin or your hands, gently roll out each layer of the dough until it reaches approximately 4 inches in diameter, resulting in 16 circles.
  3. Spoon about 1 tablespoon of cherry pie filling into the center of each circle. Seal the edges by pinching them together and roll the dough into balls.
  4. Coat all sides of the bombs with melted butter, then generously roll them in the cinnamon sugar mixture.
Air Fryer Instructions:

  1. To prepare in the air fryer, spray the air fryer basket or racks with oil to prevent sticking. Arrange the bombs in a single layer, ensuring they are spaced apart.
  2. Air fry at 330°F for approximately 6-7 minutes. Carefully wiggle the bombs to loosen them from the baskets.
  3. Continue air frying for an additional 1-2 minutes until they achieve a crispy golden brown exterior. Serve warm and enjoy the delightful flavors!

Oven Bake Instructions:

  1. Preheat your oven to 375°F and line a baking sheet with parchment paper.
  2. Arrange the bombs on the baking sheet, leaving approximately 2 inches of space between each one.
  3. Bake in the preheated oven for 12-15 minutes, or until they acquire a beautiful golden brown hue.
  4. Serve warm to experience the soft and gooey cherry filling enveloped within the crispy pastry.

Serving Tips:

  1. Serve Cherry Pie Bombs warm to fully enjoy the gooey cherry filling and crispy exterior.
  2. Consider garnishing with a sprinkle of powdered sugar or a dollop of whipped cream for an extra touch of indulgence.
  3. Pair with a scoop of vanilla ice cream for a delightful contrast of temperatures and flavors.
  4. Serve as a standalone dessert or alongside your favorite hot beverage for a cozy treat.

Storage Tips:

  1. If you have any leftover Cherry Pie Bombs, allow them to cool completely before storing.
  2. Store in an airtight container at room temperature for up to 2 days for optimal freshness and texture.
  3. To reheat, place the bombs in the microwave for a few seconds or in a preheated oven at 350°F for 5-7 minutes until warmed through.
  4. Avoid storing in the refrigerator as this can cause the pastry to become soggy.
  5. For longer storage, you can freeze the Cherry Pie Bombs in an airtight container for up to 1 month. Allow them to thaw at room temperature before reheating.
  6. Enjoy freshly made Cherry Pie Bombs whenever you crave a quick and delicious dessert!

FAQs (Frequently Asked Questions):

  1. Can I use homemade cherry pie filling instead of canned for this recipe? While canned cherry pie filling offers convenience, you can certainly use homemade filling if preferred. Ensure that your homemade filling has a thick consistency similar to canned filling to prevent leakage during baking or air frying.
  2. Can I substitute the cinnamon/sugar blend with another type of coating? Yes, you can customize the coating according to your preferences. Consider using powdered sugar, granulated sugar mixed with cocoa powder for a chocolatey twist, or even crushed nuts for added crunch. Experiment with different coatings to discover your favorite combination!
  3. Can I make Cherry Pie Bombs ahead of time and reheat them later? Absolutely! You can prepare Cherry Pie Bombs ahead of time and store them in an airtight container at room temperature for up to 2 days. When ready to enjoy, simply reheat them in the microwave for a few seconds or in a preheated oven at 350°F for 5-7 minutes until warmed through. This allows you to have freshly warmed Cherry Pie Bombs whenever you desire.
  4. Can I freeze Cherry Pie Bombs for later use? Yes, you can freeze Cherry Pie Bombs for future enjoyment. Place the cooled bombs in an airtight container or freezer bag, ensuring they are well-sealed to prevent freezer burn. They can be stored in the freezer for up to 1 month. To thaw, simply leave them at room temperature for a few hours or overnight. Once thawed, reheat them in the oven or microwave until warmed through, and they’ll be ready to serve!

Variations:

  1. Apple Pie Bombs: Substitute the cherry pie filling with apple pie filling for a delicious twist on this recipe. Sprinkle the dough with a mixture of cinnamon and sugar before rolling for an extra burst of flavor.
  2. Blueberry Pie Bombs: Use blueberry pie filling instead of cherry for a fruity variation. Consider adding a touch of lemon zest to the filling for a refreshing citrusy note.
  3. Nutella-Stuffed Bombs: Fill the dough circles with a spoonful of Nutella for a decadent chocolatey treat. Dust with powdered sugar after baking for an irresistible finish.
  4. Savory Bombs: Experiment with savory fillings such as cheese and ham, spinach and feta, or pizza toppings for a savory twist on this recipe. Skip the cinnamon sugar coating and instead sprinkle with grated cheese or herbs before baking.
  5. Mixed Berry Bombs: Combine different berry pie fillings, such as strawberry, raspberry, and blackberry, for a medley of flavors in each bite. Add a sprinkle of lemon juice to the filling to enhance the fruity taste.
  6. Cream Cheese-Stuffed Bombs: Add a dollop of cream cheese to the center of each dough circle before adding the pie filling for a creamy surprise. Sprinkle with graham cracker crumbs or crushed nuts for added texture.
  7. Lemon Meringue Bombs: Fill the dough circles with lemon curd and top with a small dollop of meringue before sealing. Bake until the meringue is golden brown for a tangy and sweet dessert reminiscent of lemon meringue pie.
  8. Pumpkin Pie Bombs: Use pumpkin pie filling instead of cherry and sprinkle the dough with pumpkin pie spice before rolling. Serve warm with a dollop of whipped cream for a cozy autumn-inspired treat.

Experiment with these variations to create unique and flavorful Cherry Pie Bombs that cater to your taste preferences and seasonal cravings!


With just a few simple steps and minimal ingredients, our Cherry Pie Bombs recipe offers a quick and delightful dessert solution for any occasion. Whether you choose to air fry or bake them in the oven, these golden treats are sure to impress with their irresistible combination of flavors and textures. Treat yourself and your loved ones to a mouthwatering dessert experience that is both easy to make and incredibly satisfying!

Print
clock clock iconcutlery cutlery iconflag flag iconfolder folder iconinstagram instagram iconpinterest pinterest iconfacebook facebook iconprint print iconsquares squares iconheart heart iconheart solid heart solid icon

Cherry Pie Bombs


  • Author: IBA

Description

Indulge in a delightful dessert experience with our Cherry Pie Bombs recipe! These delectable treats are crafted with the perfect combination of canned biscuits and luscious cherry pie filling. Whether you opt to bake them in the oven or air-fry them to golden perfection, they promise a crispy exterior and a warm, gooey interior that will leave your taste buds craving for more. Impress your guests or treat yourself to a sweet delight in just a matter of minutes!


Ingredients

  • 1 can (8-count) Grand biscuits (not flaky layers or crescent roll dough)
  • 1 cup cherry pie filling
  • ½ cup (1 stick) unsalted butter, melted
  • ½ cup cinnamon/sugar blend

Instructions

  1. Begin by separating the biscuits into two layers and placing them on a clean surface.
  2. Using a rolling pin or your hands, gently roll out each layer of the dough until it reaches approximately 4 inches in diameter, resulting in 16 circles.
  3. Spoon about 1 tablespoon of cherry pie filling into the center of each circle. Seal the edges by pinching them together and roll the dough into balls.
  4. Coat all sides of the bombs with melted butter, then generously roll them in the cinnamon sugar mixture.

Notes

Serving Tips:

  1. Serve Cherry Pie Bombs warm to fully enjoy the gooey cherry filling and crispy exterior.

  2. Consider garnishing with a sprinkle of powdered sugar or a dollop of whipped cream for an extra touch of indulgence.
  3. Pair with a scoop of vanilla ice cream for a delightful contrast of temperatures and flavors.
  4. Serve as a standalone dessert or alongside your favorite hot beverage for a cozy treat.

Storage Tips:


  1. If you have any leftover Cherry Pie Bombs, allow them to cool completely before storing.

  2. Store in an airtight container at room temperature for up to 2 days for optimal freshness and texture.
  3. To reheat, place the bombs in the microwave for a few seconds or in a preheated oven at 350°F for 5-7 minutes until warmed through.
  4. Avoid storing in the refrigerator as this can cause the pastry to become soggy.
  5. For longer storage, you can freeze the Cherry Pie Bombs in an airtight container for up to 1 month. Allow them to thaw at room temperature before reheating.
  6. Enjoy freshly made Cherry Pie Bombs whenever you crave a quick and delicious dessert!