Cheesy Garlic Scalloped Potatoes

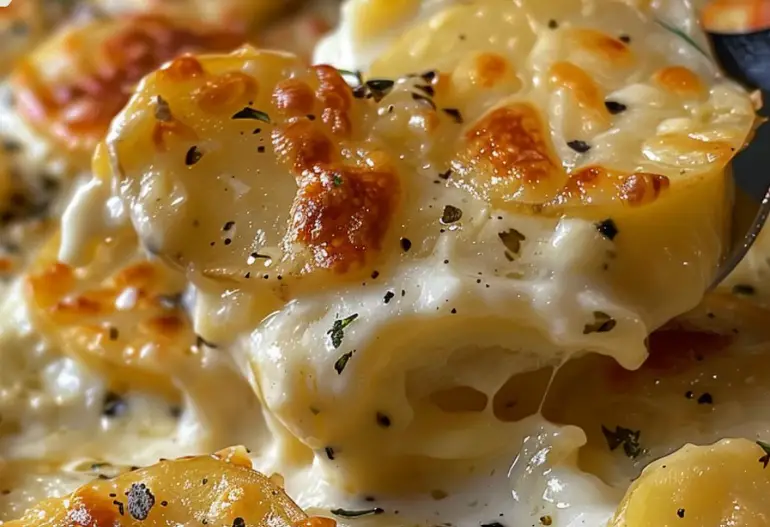
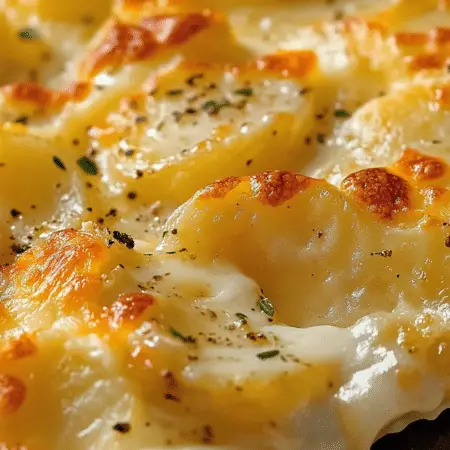
Looking for the ultimate comfort food that will leave your taste buds dancing with joy? Look no further than these delectable Cheesy Garlic Scalloped Potatoes. Bursting with flavor and creamy goodness, this dish is perfect for any occasion, whether it’s a cozy family dinner or a festive gathering with friends. Follow this simple recipe to create a culinary masterpiece that will have everyone coming back for seconds!

Ingredients:

  • 5 lbs Russet potatoes, thinly sliced
  • 2 cups onions, finely chopped
  • 6 cloves garlic, minced
  • ¼ cup butter (½ stick)
  • ¼ cup all-purpose flour
  • 1 ½ cups vegetable broth
  • 1 ½ cups heavy cream
  • 1 tablespoon salt
  • 2 teaspoons black pepper
  • 2 teaspoons Slap Ya Mama® seasoning (optional)
  • 8 oz sour cream
  • 3 cups cheddar cheese, grated (divided)
  • 1 cup pepper jack cheese, grated
  • 1 cup freshly grated Parmesan cheese

Directions:

  1. Preheat your oven to 400°F (200°C) and generously spray a 14 x 11½ x 2¼ inch baking dish with non-stick spray. Set aside for later use.
  2. Peel the Russet potatoes and slice them thinly, about ⅛ inch thick. Place the sliced potatoes in a large bowl and set aside.
  3. In a large frying pan, melt the butter over low heat. Add the chopped onions and minced garlic, and sauté for 4-5 minutes until fragrant and translucent.
  4. Sprinkle the flour over the onion and garlic mixture, stirring continuously to form a roux. Cook for a couple of minutes to remove the raw taste of the flour.
  5. Gradually pour in the vegetable broth, stirring constantly to avoid lumps. Season with salt, black pepper, and Slap Ya Mama® seasoning if using. Pour in the heavy cream and stir until the sauce thickens.
  6. Remove the sauce from the heat and stir in 2 cups of grated cheddar cheese until melted and smooth.
  7. Now, it’s time to assemble the scalloped potatoes! Begin by layering ⅓ of the sliced potatoes in the prepared baking dish. Top with ⅓ of the sour cream and ⅓ of the cheese sauce.
  8. Sprinkle ⅓ of the Parmesan cheese, followed by ⅓ of the pepper jack cheese and ⅓ of the remaining cheddar cheese.
  9. Repeat the layering process two more times, ending with a final layer of cheddar cheese on top.
  10. Cover the baking dish with foil and bake in the preheated oven for 1½ to 2 hours, or until the potatoes are tender and the cheese is bubbly and golden brown.
  11. About 15-20 minutes before the potatoes are done, remove the foil to allow the cheese to brown slightly.
  12. Once cooked, remove the cheesy garlic scalloped potatoes from the oven and let them rest for about 15 minutes before serving.
  13. Serve hot and enjoy the creamy, cheesy goodness!

Nutritional Information:

  • Prep Time: 30 minutes
  • Cooking Time: 1 hour 30 minutes
  • Total Time: 2 hours
  • Calories: 638 kcal per serving
  • Servings: 10 servings

Serving Tips:

  1. Garnish with Fresh Herbs: Before serving, sprinkle some freshly chopped parsley or chives on top for a pop of color and added freshness.
  2. Pair with Proteins: These Cheesy Garlic Scalloped Potatoes make a fantastic side dish for grilled chicken, roasted turkey, or seared steak. The creamy texture and rich flavor complement a variety of main courses.
  3. Serve as a Main Dish: For a vegetarian-friendly option, serve larger portions of the scalloped potatoes as a satisfying main course alongside a crisp green salad or roasted vegetables.
  4. Add a Side of Sauce: Consider serving a side of tangy barbecue sauce or creamy garlic aioli for dipping, enhancing the flavors of the dish and adding an extra layer of indulgence.
  5. Serve with Crusty Bread: Pair these potatoes with some warm crusty bread or dinner rolls to soak up every last bit of the delicious cheese sauce.

Storage Tips:

  1. Refrigeration: Allow any leftovers to cool completely before transferring them to an airtight container. Store in the refrigerator for up to 3-4 days.
  2. Freezing: These scalloped potatoes can be frozen for longer-term storage. Place individual portions or the entire dish in a freezer-safe container or freezer bag. They can be stored in the freezer for up to 2-3 months.
  3. Reheating: When ready to enjoy again, reheat the potatoes in the microwave or oven until heated through. Add a splash of milk or cream if needed to restore creaminess. Alternatively, for a crispy top, reheat in the oven at 350°F (175°C) until warmed and the cheese is bubbly.
  4. Adjust Consistency: As the potatoes are reheated, they may thicken slightly. Simply stir in a bit of additional broth or cream to adjust the consistency to your liking.
Variations:

  1. Bacon Lover’s Delight: For a smoky twist, add crispy bacon crumbles between the layers of potatoes. The salty flavor of the bacon pairs perfectly with the creamy cheese sauce.
  2. Herb-infused Potatoes: Enhance the flavor profile by incorporating a variety of fresh or dried herbs into the cheese sauce. Experiment with rosemary, thyme, or sage for a fragrant and earthy twist.
  3. Vegetarian Delight: Create a vegetarian version by omitting the bacon and using vegetable broth instead of chicken broth. You can also add layers of sautéed spinach, mushrooms, or thinly sliced tomatoes for extra flavor and nutrition.
  4. Spicy Kick: Turn up the heat by adding diced jalapeños or crushed red pepper flakes to the cheese sauce. This adds a fiery kick that complements the richness of the dish.
  5. Gluten-Free Option: Make this dish gluten-free by substituting the all-purpose flour with a gluten-free flour blend or cornstarch. Ensure that all other ingredients used are also gluten-free to accommodate dietary restrictions.
  6. Cheese Lover’s Dream: Experiment with different types of cheese to customize the flavor profile. Try using Gruyère, Fontina, or smoked Gouda for a unique and indulgent twist on the classic recipe.
  7. Potato Medley: Mix things up by using a combination of sweet potatoes and Yukon Gold potatoes alongside the Russet potatoes. This adds depth of flavor and a variety of textures to the dish.
  8. Herbed Breadcrumbs: For added crunch, top the cheesy scalloped potatoes with a layer of herbed breadcrumbs before baking. Simply combine breadcrumbs with melted butter and your favorite herbs, then sprinkle over the dish before baking until golden brown and crispy.

FAQs

  1. Can I prepare Cheesy Garlic Scalloped Potatoes ahead of time? Yes, you can assemble the dish ahead of time and refrigerate it until ready to bake. Simply cover tightly with foil and store in the refrigerator for up to 24 hours before baking as directed.
  2. Can I use different types of potatoes for this recipe? While Russet potatoes are traditional for scalloped potatoes, you can experiment with Yukon Gold or sweet potatoes for a unique twist. Keep in mind that different types of potatoes may vary in texture and cooking times.
  3. Can I make this recipe without heavy cream? Yes, you can substitute the heavy cream with half-and-half or whole milk for a lighter version of the dish. However, the sauce may be slightly less creamy.
  4. How can I make this recipe gluten-free? To make this recipe gluten-free, simply use a gluten-free flour blend or cornstarch in place of the all-purpose flour. Ensure that all other ingredients used are also gluten-free.
  5. Can I freeze leftovers of Cheesy Garlic Scalloped Potatoes? Yes, you can freeze leftovers of this dish for up to 2-3 months. Make sure to store them in an airtight container or freezer bag, and allow them to thaw in the refrigerator before reheating.
  6. What can I serve with Cheesy Garlic Scalloped Potatoes? These potatoes pair well with a variety of main dishes, such as roasted chicken, grilled steak, or baked salmon. They also make a delicious accompaniment to holiday meals or potluck gatherings.
 

With its layers of tender potatoes, creamy cheese sauce, and aromatic garlic flavor, these Cheesy Garlic Scalloped Potatoes are sure to become a family favorite. Whether served as a side dish or the star of the meal, this comforting dish will leave everyone craving more. Give this recipe a try and indulge in a taste of pure comfort today!

Print
clock clock iconcutlery cutlery iconflag flag iconfolder folder iconinstagram instagram iconpinterest pinterest iconfacebook facebook iconprint print iconsquares squares iconheart heart iconheart solid heart solid icon

Cheesy Garlic Scalloped Potatoes


  • Author: Lusine Svetlana

Description

Looking for the ultimate comfort food that will leave your taste buds dancing with joy? Look no further than these delectable Cheesy Garlic Scalloped Potatoes. Bursting with flavor and creamy goodness, this dish is perfect for any occasion, whether it’s a cozy family dinner or a festive gathering with friends. Follow this simple recipe to create a culinary masterpiece that will have everyone coming back for seconds!


Ingredients

  • 5 lbs Russet potatoes, thinly sliced
  • 2 cups onions, finely chopped
  • 6 cloves garlic, minced
  • ¼ cup butter (½ stick)
  • ¼ cup all-purpose flour
  • 1 ½ cups vegetable broth
  • 1 ½ cups heavy cream
  • 1 tablespoon salt
  • 2 teaspoons black pepper
  • 2 teaspoons Slap Ya Mama® seasoning (optional)
  • 8 oz sour cream
  • 3 cups cheddar cheese, grated (divided)
  • 1 cup pepper jack cheese, grated
  • 1 cup freshly grated Parmesan cheese

Instructions

  1. Preheat your oven to 400°F (200°C) and generously spray a 14 x 11½ x 2¼ inch baking dish with non-stick spray. Set aside for later use.
  2. Peel the Russet potatoes and slice them thinly, about ⅛ inch thick. Place the sliced potatoes in a large bowl and set aside.
  3. In a large frying pan, melt the butter over low heat. Add the chopped onions and minced garlic, and sauté for 4-5 minutes until fragrant and translucent.
  4. Sprinkle the flour over the onion and garlic mixture, stirring continuously to form a roux. Cook for a couple of minutes to remove the raw taste of the flour.
  5. Gradually pour in the vegetable broth, stirring constantly to avoid lumps. Season with salt, black pepper, and Slap Ya Mama® seasoning if using. Pour in the heavy cream and stir until the sauce thickens.
  6. Remove the sauce from the heat and stir in 2 cups of grated cheddar cheese until melted and smooth.
  7. Now, it’s time to assemble the scalloped potatoes! Begin by layering ⅓ of the sliced potatoes in the prepared baking dish. Top with ⅓ of the sour cream and ⅓ of the cheese sauce.
  8. Sprinkle ⅓ of the Parmesan cheese, followed by ⅓ of the pepper jack cheese and ⅓ of the remaining cheddar cheese.
  9. Repeat the layering process two more times, ending with a final layer of cheddar cheese on top.
  10. Cover the baking dish with foil and bake in the preheated oven for 1½ to 2 hours, or until the potatoes are tender and the cheese is bubbly and golden brown.
  11. About 15-20 minutes before the potatoes are done, remove the foil to allow the cheese to brown slightly.
  12. Once cooked, remove the cheesy garlic scalloped potatoes from the oven and let them rest for about 15 minutes before serving.
  13. Serve hot and enjoy the creamy, cheesy goodness!

Notes

Serving Tips:

  1. Garnish with Fresh Herbs: Before serving, sprinkle some freshly chopped parsley or chives on top for a pop of color and added freshness.
  2. Pair with Proteins: These Cheesy Garlic Scalloped Potatoes make a fantastic side dish for grilled chicken, roasted turkey, or seared steak. The creamy texture and rich flavor complement a variety of main courses.
  3. Serve as a Main Dish: For a vegetarian-friendly option, serve larger portions of the scalloped potatoes as a satisfying main course alongside a crisp green salad or roasted vegetables.
  4. Add a Side of Sauce: Consider serving a side of tangy barbecue sauce or creamy garlic aioli for dipping, enhancing the flavors of the dish and adding an extra layer of indulgence.
  5. Serve with Crusty Bread: Pair these potatoes with some warm crusty bread or dinner rolls to soak up every last bit of the delicious cheese sauce.

Storage Tips:


  1. Refrigeration: Allow any leftovers to cool completely before transferring them to an airtight container. Store in the refrigerator for up to 3-4 days.
  2. Freezing: These scalloped potatoes can be frozen for longer-term storage. Place individual portions or the entire dish in a freezer-safe container or freezer bag. They can be stored in the freezer for up to 2-3 months.
  3. Reheating: When ready to enjoy again, reheat the potatoes in the microwave or oven until heated through. Add a splash of milk or cream if needed to restore creaminess. Alternatively, for a crispy top, reheat in the oven at 350°F (175°C) until warmed and the cheese is bubbly.
  4. Adjust Consistency: As the potatoes are reheated, they may thicken slightly. Simply stir in a bit of additional broth or cream to adjust the consistency to your liking.