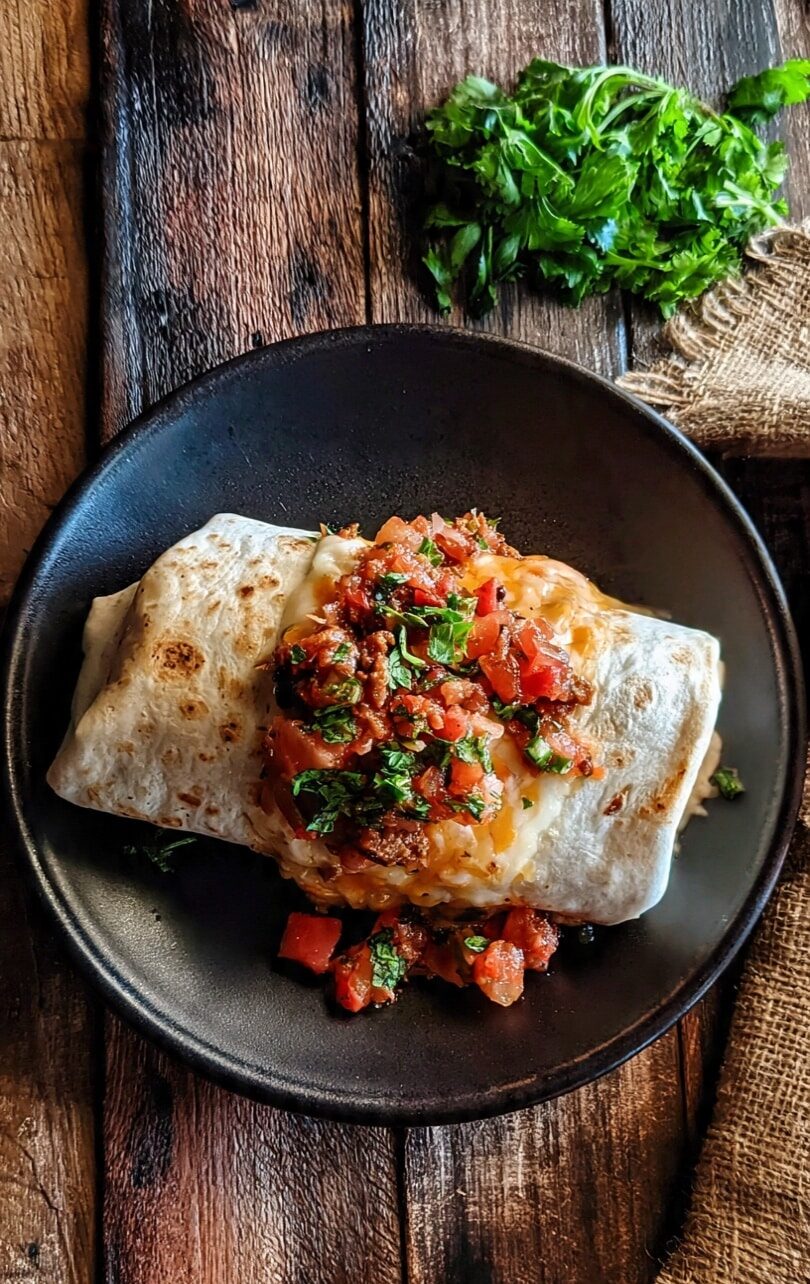
Satisfy your cravings with the delectable goodness of Beef Meximelt – a speedy Tex-Mex treat perfect for those busy weeknights. Featuring seasoned ground beef, oozing melted cheese, and zesty pico de gallo salsa snugly wrapped in warm flour tortillas, this recipe promises a homemade meal with minimal effort and maximum flavor.
Ingredients:
- 1 lb lean ground beef
- 1 ounce packet taco seasoning
- ½ cup water
- 6 large flour tortillas
- 16 ounces shredded Mexican cheese blend
- ½ cup pico de gallo salsa
Directions:
- Start by browning the lean ground beef in a large pan over medium heat until it’s cooked through. Once done, drain any excess oil and return the beef to the pan.
- Next, add the taco seasoning and water to the ground beef. Using a spoon, break down the meat into fine crumbles and mix well with the seasoning.
- Let the mixture come to a gentle boil, then reduce the heat and allow it to simmer for 5-10 minutes until it reaches a saucy consistency. Once achieved, remove it from the heat.
- To prepare the tortillas, wrap them in a damp paper towel and microwave for 15-20 seconds to soften them up.
- Now, it’s time to assemble your Meximelts. Spoon a generous portion of the seasoned ground beef onto each tortilla, followed by a generous sprinkle of shredded Mexican cheese blend and a dollop of pico de gallo salsa.
- Carefully tuck in the ends of the tortillas and roll them up tightly like burritos, ensuring all the savory goodness stays intact.
- To melt the cheese and give the tortillas a slightly steamed texture, wrap each Meximelt in a damp paper towel and microwave for an additional 15 seconds.
- Once heated through, serve your Beef Meximelts hot and savor the irresistible Tex-Mex flavors that are sure to delight your taste buds.
Prep Time: 5 minutes Cooking Time: 15 minutes Total Time: 20 minutes Servings: 6

Serving and Storage Tips:
Serving Tips:
- Garnish your Beef Meximelts with fresh cilantro, sliced jalapeños, or a dollop of sour cream for added flavor and visual appeal.
- Serve alongside classic Tex-Mex sides like Mexican rice, refried beans, or guacamole to create a complete and satisfying meal.
- For a fun twist, try adding sliced avocado or pickled red onions to your Meximelts before rolling them up.
- Pair with your favorite Mexican beverages such as margaritas, Mexican beer, or agua fresca for a refreshing complement to the meal.
Storage Tips:
- If you have leftovers, store them in an airtight container in the refrigerator for up to 2-3 days.
- To reheat, simply microwave individual Meximelts for 30-60 seconds until heated through, or place them in a preheated oven at 350°F (175°C) for 10-15 minutes.
- For longer storage, you can freeze assembled but uncooked Meximelts in a single layer on a baking sheet. Once frozen, transfer them to a freezer-safe bag or container. They can be stored in the freezer for up to 1-2 months.
- When ready to enjoy, thaw frozen Meximelts overnight in the refrigerator before reheating according to the instructions above.
- Note that the texture of the tortillas may be slightly softer after freezing and reheating, but the flavor will remain deliciously intact.
Variations:
- Chicken Meximelts: Swap out the ground beef for cooked shredded chicken seasoned with taco seasoning for a lighter alternative. Proceed with assembling and cooking as directed in the original recipe.
- Veggie Meximelts: For a vegetarian option, replace the ground beef with a mix of sautéed vegetables such as bell peppers, onions, corn, and black beans. Season with taco seasoning for added flavor and proceed with the recipe as usual.
- Seafood Meximelts: Experiment with seafood by using cooked shrimp or fish as a filling. Season the seafood with a blend of cumin, chili powder, and lime juice for a zesty kick. Combine with shredded cheese and salsa before rolling up in tortillas and cooking.
- Breakfast Meximelts: Transform your Meximelts into a delicious breakfast option by filling them with scrambled eggs, cooked breakfast sausage or bacon, and shredded cheese. Serve with salsa and sour cream for a morning twist on this Tex-Mex classic.
FAQs:
- Can I use ground turkey instead of ground beef in this recipe?
- Yes, ground turkey can be substituted for ground beef if you prefer a leaner option. Simply cook the ground turkey with the taco seasoning and water as instructed in the recipe.
- How can I make this recipe spicier?
- To add more heat to your Beef Meximelts, you can use spicy taco seasoning, incorporate diced jalapeños into the ground beef mixture, or drizzle hot sauce over the filling before rolling up the tortillas.
- Can I use corn tortillas instead of flour tortillas?
- While flour tortillas are traditionally used for Meximelts, you can certainly use corn tortillas if you prefer. Keep in mind that corn tortillas may be more prone to tearing when rolled, so handle them gently.
- Can I make Beef Meximelts ahead of time?
- Yes, you can prepare the seasoned ground beef mixture in advance and store it in the refrigerator for up to 2 days. When ready to serve, simply reheat the filling, assemble the Meximelts, and microwave or bake as directed.
- How can I prevent the tortillas from becoming soggy?
- To prevent soggy tortillas, make sure to drain any excess liquid from the ground beef mixture before assembling the Meximelts. Additionally, avoid overfilling the tortillas to prevent them from becoming too wet.
- Can I customize the toppings in this recipe?
- Absolutely! Feel free to personalize your Meximelts with additional toppings such as sliced avocado, diced tomatoes, shredded lettuce, or chopped cilantro for added freshness and flavor.
With its straightforward preparation and mouthwatering taste, Beef Meximelt is the ultimate go-to recipe for a quick and satisfying Tex-Mex dinner. Whether you’re cooking for family or hosting a casual gathering, this flavorful dish is sure to be a hit. So, whip up a batch tonight and treat yourself to a delicious homemade meal in no time!
Print
Beef Meximelt Recipe
Description
Satisfy your cravings with the delectable goodness of Beef Meximelt – a speedy Tex-Mex treat perfect for those busy weeknights. Featuring seasoned ground beef, oozing melted cheese, and zesty pico de gallo salsa snugly wrapped in warm flour tortillas, this recipe promises a homemade meal with minimal effort and maximum flavor.
Ingredients
- 1 lb lean ground beef
- 1 ounce packet taco seasoning
- ½ cup water
- 6 large flour tortillas
- 16 ounces shredded Mexican cheese blend
- ½ cup pico de gallo salsa
Instructions
- Start by browning the lean ground beef in a large pan over medium heat until it’s cooked through. Once done, drain any excess oil and return the beef to the pan.
- Next, add the taco seasoning and water to the ground beef. Using a spoon, break down the meat into fine crumbles and mix well with the seasoning.
- Let the mixture come to a gentle boil, then reduce the heat and allow it to simmer for 5-10 minutes until it reaches a saucy consistency. Once achieved, remove it from the heat.
- To prepare the tortillas, wrap them in a damp paper towel and microwave for 15-20 seconds to soften them up.
- Now, it’s time to assemble your Meximelts. Spoon a generous portion of the seasoned ground beef onto each tortilla, followed by a generous sprinkle of shredded Mexican cheese blend and a dollop of pico de gallo salsa.
- Carefully tuck in the ends of the tortillas and roll them up tightly like burritos, ensuring all the savory goodness stays intact.
- To melt the cheese and give the tortillas a slightly steamed texture, wrap each Meximelt in a damp paper towel and microwave for an additional 15 seconds.
- Once heated through, serve your Beef Meximelts hot and savor the irresistible Tex-Mex flavors that are sure to delight your taste buds.
Notes
Serving Tips:
- Garnish your Beef Meximelts with fresh cilantro, sliced jalapeños, or a dollop of sour cream for added flavor and visual appeal.
- Serve alongside classic Tex-Mex sides like Mexican rice, refried beans, or guacamole to create a complete and satisfying meal.
- For a fun twist, try adding sliced avocado or pickled red onions to your Meximelts before rolling them up.
- Pair with your favorite Mexican beverages such as margaritas, Mexican beer, or agua fresca for a refreshing complement to the meal.
Storage Tips:
- If you have leftovers, store them in an airtight container in the refrigerator for up to 2-3 days.
- To reheat, simply microwave individual Meximelts for 30-60 seconds until heated through, or place them in a preheated oven at 350°F (175°C) for 10-15 minutes.
- For longer storage, you can freeze assembled but uncooked Meximelts in a single layer on a baking sheet. Once frozen, transfer them to a freezer-safe bag or container. They can be stored in the freezer for up to 1-2 months.
- When ready to enjoy, thaw frozen Meximelts overnight in the refrigerator before reheating according to the instructions above.
- Note that the texture of the tortillas may be slightly softer after freezing and reheating, but the flavor will remain deliciously intact.