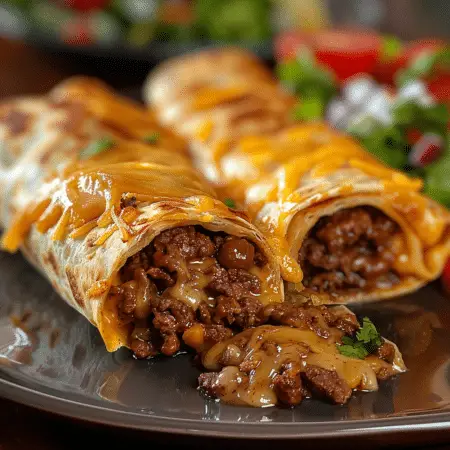
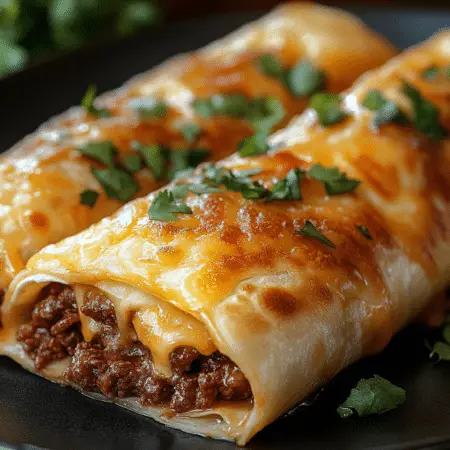
Looking for a delicious, crispy, and cheesy Mexican dish to satisfy your cravings? Try this easy Beef and Cheese Chimichangas recipe! With a perfect blend of seasoned beef and melted cheese, these chimichangas are sure to become a family favorite.

Ingredients:
6 large flour tortillas
1 lb ground beef
1 onion, finely chopped
2 cloves garlic, minced
1 teaspoon cumin
1 teaspoon chili powder
1/2 teaspoon salt
1/2 teaspoon black pepper
1 cup cheddar cheese, shredded
1/2 cup Monterey Jack cheese, shredded
Vegetable oil, for frying
Salsa, sour cream, and guacamole, for serving
Directions:
1. Cook the Beef Mixture
In a skillet over medium heat, cook the ground beef, onion, and garlic until the beef is browned and the onion is soft. Drain any excess fat to ensure a less greasy filling.
2. Season the Beef
Stir in the cumin, chili powder, salt, and black pepper. Cook for another 2 minutes to blend the flavors. Remove from heat and let the mixture cool slightly. Then, mix in the shredded cheddar and Monterey Jack cheeses.
3. Fill the Tortillas
Spoon about 1/6 of the beef and cheese mixture onto the center of each tortilla. Fold the sides of the tortilla in, then roll up from the bottom to enclose the filling completely. Make sure the chimichangas are tightly rolled to prevent them from opening during frying.
4. Fry the Chimichangas
Heat a large amount of vegetable oil in a deep skillet over medium-high heat. Fry the chimichangas until golden brown on all sides, turning as needed. This should take about 3-4 minutes per side. Drain on paper towels to remove excess oil.
5. Serve Hot
Serve the chimichangas hot with salsa, sour cream, and guacamole on the side. These toppings add a fresh and creamy contrast to the crispy chimichangas.
Prep Time: 20 minutes | Cooking Time: 30 minutes | Total Time: 50 minutes | Calories: 650 kcal | Servings: 6

Serving and Storage Tips:
Serving Tips
1. Pair with Fresh Sides
Serve your chimichangas with fresh and vibrant sides to balance the richness of the dish. Consider pairing them with Mexican rice, refried beans, or a fresh green salad.
2. Add Toppings
Top the chimichangas with a variety of fresh toppings like diced tomatoes, chopped cilantro, sliced jalapeños, and shredded lettuce. These additions provide a nice crunch and burst of freshness.
3. Provide Dipping Sauces
Offer a selection of dipping sauces such as salsa, sour cream, and guacamole. These add layers of flavor and help cool down the spiciness if needed.
4. Serve with Lime Wedges
Add lime wedges on the side for guests to squeeze over their chimichangas. The acidity from the lime juice brightens the flavors and adds a refreshing tang.
5. Enjoy Hot
For the best experience, serve the chimichangas immediately after frying while they are hot and crispy. This ensures the cheese is perfectly melted and the exterior remains crunchy.
Storage Tips
1. Refrigeration
If you have leftover chimichangas, allow them to cool completely before storing. Place them in an airtight container and refrigerate. They will keep well for up to 3-4 days.
2. Freezing
For longer storage, you can freeze the chimichangas. Wrap each one tightly in plastic wrap and then in aluminum foil. Place them in a freezer-safe bag or container, and label with the date. They can be frozen for up to 3 months.
3. Reheating
To reheat refrigerated or frozen chimichangas, preheat your oven to 375°F (190°C). Place the chimichangas on a baking sheet and bake for about 15-20 minutes (if refrigerated) or 25-30 minutes (if frozen) until heated through and crispy. For best results, avoid microwaving as it can make the chimichangas soggy.
4. Avoiding Sogginess
To keep the chimichangas from becoming soggy when reheating, place them on a wire rack over the baking sheet. This allows air to circulate around the chimichangas, helping them stay crispy.
5. Storing Leftover Filling
If you have leftover beef and cheese filling, store it in an airtight container in the refrigerator for up to 3 days. You can use it to make more chimichangas later or as a filling for tacos, burritos, or quesadillas.
By following these serving and storage tips, you can enjoy your Beef and Cheese Chimichangas at their best, whether you’re serving them fresh or reheating leftovers.
Variations :
1. Chicken and Cheese Chimichangas
Replace the ground beef with shredded or diced cooked chicken. You can use rotisserie chicken for convenience. Season the chicken similarly, or try adding a bit of taco seasoning for extra flavor.
2. Vegetarian Chimichangas
Create a vegetarian version by replacing the meat with a mixture of black beans, corn, and diced bell peppers. Add some sautéed spinach or mushrooms for more variety. Season the mixture with cumin, chili powder, and a pinch of smoked paprika.
3. Breakfast Chimichangas
Make breakfast-friendly chimichangas by using scrambled eggs, crumbled cooked sausage or bacon, and shredded cheese. Add some diced bell peppers and onions for extra flavor and texture. Serve with salsa and avocado slices.
4. Spicy Beef Chimichangas
For a spicier version, add diced jalapeños or a teaspoon of hot sauce to the beef mixture. You can also use a spicier cheese blend, such as Pepper Jack, instead of Monterey Jack.
5. BBQ Beef Chimichangas
Mix cooked ground beef with barbecue sauce and shredded cheddar cheese. This variation gives a sweet and tangy twist to the classic chimichanga. Serve with coleslaw on the side for a complete meal.
6. Seafood Chimichangas
Use cooked shrimp or crab meat mixed with a little cream cheese, shredded cheese, and green onions. This seafood filling provides a luxurious and flavorful alternative to the traditional beef filling.
7. Chipotle Beef Chimichangas
Add chipotle peppers in adobo sauce to the beef mixture for a smoky and slightly spicy flavor. Chop the chipotle peppers finely and mix them into the ground beef along with some of the adobo sauce.
8. Cheese-Only Chimichangas
For a cheesy delight, skip the meat and use a combination of your favorite cheeses. Try using a mix of cheddar, Monterey Jack, and a bit of cream cheese for a creamy and gooey filling.
9. Southwestern Chimichangas
Enhance the filling with southwestern flavors by adding black beans, corn, and diced tomatoes to the ground beef mixture. Season with cumin, chili powder, and a bit of cilantro for a burst of flavor.
10. Dessert Chimichangas
For a sweet twist, try making dessert chimichangas. Fill flour tortillas with a mixture of cream cheese, sugar, and a bit of vanilla extract. Add a spoonful of fruit preserves or fresh berries. Roll up and fry until golden, then dust with powdered sugar and serve with a drizzle of chocolate or caramel sauce.
By experimenting with these variations, you can keep your chimichanga meals exciting and suited to different tastes and occasions. Whether you prefer a classic beef and cheese filling or want to try something new, these ideas will help you create delicious and diverse chimichangas.
This Beef and Cheese Chimichangas recipe is not only delicious but also easy to prepare, making it perfect for any weeknight dinner. Enjoy the crispy exterior and the savory, cheesy filling with your favorite Mexican sides!
Print
Beef and Cheese Chimichangas
Description
Looking for a delicious, crispy, and cheesy Mexican dish to satisfy your cravings? Try this easy Beef and Cheese Chimichangas recipe! With a perfect blend of seasoned beef and melted cheese, these chimichangas are sure to become a family favorite.
Ingredients
6 large flour tortillas
1 lb ground beef
1 onion, finely chopped
2 cloves garlic, minced
1 teaspoon cumin
1 teaspoon chili powder
1/2 teaspoon salt
1/2 teaspoon black pepper
1 cup cheddar cheese, shredded
1/2 cup Monterey Jack cheese, shredded
Vegetable oil, for frying
Salsa, sour cream, and guacamole, for serving
Instructions
1. Cook the Beef Mixture
In a skillet over medium heat, cook the ground beef, onion, and garlic until the beef is browned and the onion is soft. Drain any excess fat to ensure a less greasy filling.
2. Season the Beef
Stir in the cumin, chili powder, salt, and black pepper. Cook for another 2 minutes to blend the flavors. Remove from heat and let the mixture cool slightly. Then, mix in the shredded cheddar and Monterey Jack cheeses.
3. Fill the Tortillas
Spoon about 1/6 of the beef and cheese mixture onto the center of each tortilla. Fold the sides of the tortilla in, then roll up from the bottom to enclose the filling completely. Make sure the chimichangas are tightly rolled to prevent them from opening during frying.
4. Fry the Chimichangas
Heat a large amount of vegetable oil in a deep skillet over medium-high heat. Fry the chimichangas until golden brown on all sides, turning as needed. This should take about 3-4 minutes per side. Drain on paper towels to remove excess oil.
5. Serve Hot
Serve the chimichangas hot with salsa, sour cream, and guacamole on the side. These toppings add a fresh and creamy contrast to the crispy chimichangas.
Prep Time: 20 minutes | Cooking Time: 30 minutes | Total Time: 50 minutes | Calories: 650 kcal | Servings: 6
Notes
Serving Tips
1. Pair with Fresh Sides
Serve your chimichangas with fresh and vibrant sides to balance the richness of the dish. Consider pairing them with Mexican rice, refried beans, or a fresh green salad.
2. Add Toppings
Top the chimichangas with a variety of fresh toppings like diced tomatoes, chopped cilantro, sliced jalapeños, and shredded lettuce. These additions provide a nice crunch and burst of freshness.
3. Provide Dipping Sauces
Offer a selection of dipping sauces such as salsa, sour cream, and guacamole. These add layers of flavor and help cool down the spiciness if needed.
4. Serve with Lime Wedges
Add lime wedges on the side for guests to squeeze over their chimichangas. The acidity from the lime juice brightens the flavors and adds a refreshing tang.
5. Enjoy Hot
For the best experience, serve the chimichangas immediately after frying while they are hot and crispy. This ensures the cheese is perfectly melted and the exterior remains crunchy.
Storage Tips
1. Refrigeration
If you have leftover chimichangas, allow them to cool completely before storing. Place them in an airtight container and refrigerate. They will keep well for up to 3-4 days.
2. Freezing
For longer storage, you can freeze the chimichangas. Wrap each one tightly in plastic wrap and then in aluminum foil. Place them in a freezer-safe bag or container, and label with the date. They can be frozen for up to 3 months.
3. Reheating
To reheat refrigerated or frozen chimichangas, preheat your oven to 375°F (190°C). Place the chimichangas on a baking sheet and bake for about 15-20 minutes (if refrigerated) or 25-30 minutes (if frozen) until heated through and crispy. For best results, avoid microwaving as it can make the chimichangas soggy.
4. Avoiding Sogginess
To keep the chimichangas from becoming soggy when reheating, place them on a wire rack over the baking sheet. This allows air to circulate around the chimichangas, helping them stay crispy.
5. Storing Leftover Filling
If you have leftover beef and cheese filling, store it in an airtight container in the refrigerator for up to 3 days. You can use it to make more chimichangas later or as a filling for tacos, burritos, or quesadillas.
By following these serving and storage tips, you can enjoy your Beef and Cheese Chimichangas at their best, whether you’re serving them fresh or reheating leftovers.
