Bear Paw Cookies

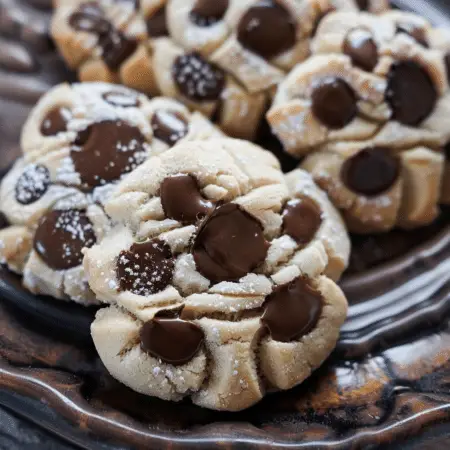
If you’re looking for a delightful baking adventure that’s both playful and scrumptious, look no further than these Bear Paw Cookies. These soft, buttery treats topped with chocolate melting wafers and chocolate chips are sure to charm both kids and adults alike. Here’s how you can bring these adorable bear-themed cookies to life in your kitchen:

Ingredients:

  • 1 cup unsalted butter, softened
  • 1 cup sugar
  • 1 egg
  • 1 teaspoon vanilla extract
  • 2 cups all-purpose flour
  • 1 teaspoon baking powder
  • ½ teaspoon baking soda
  • ¼ teaspoon salt
  • 24 Ghiradelli dark chocolate melting wafers
  • 72 semi-sweet chocolate chips (3 chips per cookie)

Directions:

Step 1: Prepare for Baking

  • Preheat your oven to 350 degrees Fahrenheit. Line a cookie sheet with a silicone baking mat or parchment paper for easy cleanup.

Step 2: Make the Cookie Dough

  • In the bowl of a stand mixer, cream together the softened butter and sugar until light and fluffy.
  • Add the egg and vanilla extract, then beat until well combined.
  • In a separate bowl, whisk together the flour, baking powder, baking soda, and salt.
  • Gradually add the dry ingredients to the wet ingredients, mixing until a soft dough forms.

Step 3: Shape and Bake

  • Using a small ice cream scoop or tablespoon, scoop out dough and roll into balls. For a slightly crunchy texture, roll each ball in extra sugar.
  • Place the dough balls onto the prepared cookie sheet about 2 inches apart.
  • Bake in the preheated oven for 9-12 minutes, or until the edges are lightly golden.

Step 4: Create the Bear Paw Design

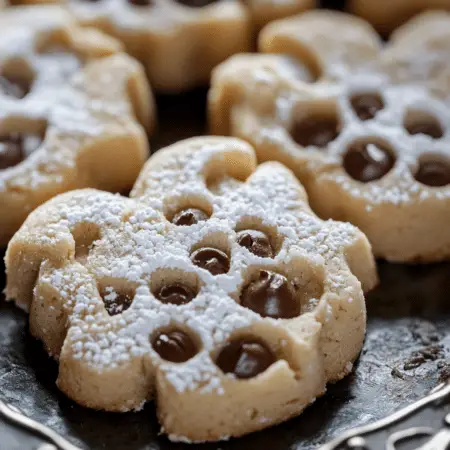
  • Remove from the oven and immediately press one Ghiradelli dark chocolate melting wafer into the center of each cookie to create the paw pad.
  • Place 3 semi-sweet chocolate chips above the wafer to resemble claws on each cookie.

Step 5: Cool and Enjoy

  • Allow the cookies to cool on the baking sheet for 5 minutes, then transfer them to a wire rack to cool completely.
  • Once cooled, enjoy these adorable Bear Paw Cookies with a glass of milk or your favorite hot beverage!

Prep Time: 10 minutes | Cooking Time: 9-12 minutes | Total Time: 19 minutes | Servings: 24 cookies

Serving and Storage Tips:

After baking up a batch of these charming Bear Paw Cookies, here are some useful tips to ensure they are served and stored perfectly:

Serving Tips:

  1. Freshness: Bear Paw Cookies are best enjoyed fresh out of the oven when the chocolate is still slightly melted. Serve them warm for a gooey, delightful treat.
  2. Accompaniments: Pair these cookies with a cold glass of milk, hot cocoa, or your favorite coffee. The combination of chocolate and buttery cookie will be perfectly complemented by a beverage.
  3. Presentation: Arrange the cookies on a decorative platter or serve them in individual paper liners for a whimsical touch, especially at parties or gatherings.
  4. Variety: Experiment with different types of chocolate for the paw pads and claws to add visual appeal and flavor variety. White chocolate or milk chocolate wafers can also be used.

Storage Tips:

  1. Room Temperature: Store Bear Paw Cookies in an airtight container at room temperature for up to 3-4 days. Ensure the container is tightly sealed to maintain freshness and prevent them from drying out.
  2. Reheating: If cookies lose their softness, you can reheat them in the microwave for a few seconds to restore their warm, gooey texture.
  3. Freezing: These cookies freeze well. Place them in a single layer in a freezer-safe container or zip-top bag with parchment paper between layers to prevent sticking. They can be frozen for up to 2-3 months.
  4. Thawing: When ready to enjoy frozen Bear Paw Cookies, thaw them at room temperature or in the refrigerator. You can also reheat them in the oven at a low temperature to freshen them up.
  5. Layering: If stacking cookies for storage, place a sheet of parchment paper between layers to prevent them from sticking together and preserve their appearance.
Variations:

  1. Nutty Bear Paws:
    • Add chopped nuts (such as almonds, pecans, or walnuts) to the cookie dough for extra crunch and nutty flavor. Press a whole nut into the center of each cookie before baking for added texture.
  2. Double Chocolate Bear Paws:
    • Use chocolate cookie dough instead of plain. Add cocoa powder to the dough along with chocolate chips for a rich, double chocolate flavor. Top with a chocolate melting wafer and chocolate chips as usual.
  3. Peanut Butter Lover’s Bear Paws:
    • Incorporate creamy peanut butter into the cookie dough for a peanut buttery twist. Use peanut butter chips or chopped peanut butter cups instead of chocolate chips for the claws.
  4. Oatmeal Bear Paws:
    • Replace a portion of the all-purpose flour with rolled oats for an oatmeal cookie variation. The oats add a chewy texture and extra heartiness. Top with chocolate melting wafers and chips as usual.
  5. Caramel Drizzle Bear Paws:
    • After baking and cooling, drizzle each cookie with melted caramel sauce for a sweet and gooey finish. Sprinkle with sea salt for a delightful salty-sweet combination.
  6. White Chocolate Raspberry Bear Paws:
    • Use white chocolate melting wafers instead of dark chocolate. Before baking, place a dollop of raspberry jam or preserve in the center of each cookie and swirl lightly with a toothpick. Top with white chocolate wafers and white chocolate chips.
  7. Coconut Bear Paws:
    • Add shredded coconut to the cookie dough for a tropical twist. Press a whole almond or macadamia nut into the center of each cookie before baking. Top with chocolate melting wafers and coconut flakes.
  8. Mint Chocolate Bear Paws:
    • Add peppermint extract to the cookie dough for a refreshing minty flavor. Use mint chocolate chips or chopped Andes mints for the claws. Top with a chocolate melting wafer as usual.
  9. Orange Zest Bear Paws:
    • Mix orange zest into the cookie dough for a citrusy burst of flavor. Use white chocolate melting wafers and white chocolate chips. Optionally, drizzle with melted dark chocolate after baking.
  10. Gluten-Free Bear Paws:
    • Substitute gluten-free flour for the all-purpose flour to make the cookies gluten-free. Ensure all other ingredients, including the chocolate melting wafers and chips, are gluten-free certified.

FAQs:

  1. Can I use salted butter instead of unsalted butter?
    • Yes, you can use salted butter, but adjust the amount of additional salt in the recipe accordingly or omit it altogether to avoid overly salty cookies.
  2. Can I make the cookie dough ahead of time and refrigerate it?
    • Yes, you can refrigerate the cookie dough for up to 24 hours before baking. Cover the dough tightly with plastic wrap or store it in an airtight container. Allow it to come to room temperature for easier scooping before baking.
  3. What if I don’t have a stand mixer?
    • You can use a hand mixer or even mix the dough by hand using a sturdy spatula or wooden spoon. Cream the butter and sugar thoroughly until light and fluffy.
  4. Can I substitute vanilla extract with another flavor?
    • Yes, you can experiment with different extracts such as almond extract, coconut extract, or even maple extract for a different flavor profile in the cookies.
  5. How do I prevent the chocolate wafers from melting too much during baking?
    • Press the chocolate wafers gently into the cookies immediately after removing them from the oven. They will soften slightly but should retain their shape without completely melting.
  6. Can I use different types of chocolate for the claws?
    • Absolutely! Try using white chocolate chips, milk chocolate chips, or even peanut butter chips for a variety of flavors. Adjust the amount to your preference for sweetness.
  7. How do I store leftover Bear Paw Cookies?
    • Store cooled cookies in an airtight container at room temperature for up to 3-4 days. For longer storage, freeze them in a freezer-safe container or zip-top bag for up to 2-3 months.
  8. Can I omit the chocolate chips or use fewer chips per cookie?
    • Yes, you can adjust the amount of chocolate chips to suit your taste preferences. Using fewer chips or omitting them entirely will still result in delicious Bear Paw Cookies.
  9. How can I make these cookies more kid-friendly for baking together?
    • Let kids help with scooping and rolling the cookie dough into balls. They can also assist in pressing the chocolate wafers and chocolate chips onto the cookies after baking for a fun and interactive baking experience.
  10. Can I make these cookies vegan or dairy-free?
    • Yes, you can substitute dairy-free margarine or coconut oil for butter, and use a flaxseed egg (1 tablespoon ground flaxseed + 3 tablespoons water) instead of a regular egg. Ensure the chocolate wafers and chocolate chips are dairy-free and vegan-certified.
 

Indulge your sweet tooth with these whimsical Bear Paw Cookies, perfect for any occasion from birthday parties to family gatherings. Easy to make and even more enjoyable to eat, they’re guaranteed to bring smiles and satisfy cravings. Get creative with the decorations and involve the whole family in making these delightful treats. Dive into a world of playful baking and treat yourself to these irresistible cookies today!

 
Print
clock clock iconcutlery cutlery iconflag flag iconfolder folder iconinstagram instagram iconpinterest pinterest iconfacebook facebook iconprint print iconsquares squares iconheart heart iconheart solid heart solid icon

Bear Paw Cookies


  • Author: Lusine Svetlana

Description

If you’re looking for a delightful baking adventure that’s both playful and scrumptious, look no further than these Bear Paw Cookies. These soft, buttery treats topped with chocolate melting wafers and chocolate chips are sure to charm both kids and adults alike. Here’s how you can bring these adorable bear-themed cookies to life in your kitchen:


Ingredients

  • 1 cup unsalted butter, softened
  • 1 cup sugar
  • 1 egg
  • 1 teaspoon vanilla extract
  • 2 cups all-purpose flour
  • 1 teaspoon baking powder
  • ½ teaspoon baking soda
  • ¼ teaspoon salt
  • 24 Ghiradelli dark chocolate melting wafers
  • 72 semi-sweet chocolate chips (3 chips per cookie)

Instructions

Step 1: Prepare for Baking

  • Preheat your oven to 350 degrees Fahrenheit. Line a cookie sheet with a silicone baking mat or parchment paper for easy cleanup.

Step 2: Make the Cookie Dough

  • In the bowl of a stand mixer, cream together the softened butter and sugar until light and fluffy.
  • Add the egg and vanilla extract, then beat until well combined.
  • In a separate bowl, whisk together the flour, baking powder, baking soda, and salt.
  • Gradually add the dry ingredients to the wet ingredients, mixing until a soft dough forms.

Step 3: Shape and Bake

  • Using a small ice cream scoop or tablespoon, scoop out dough and roll into balls. For a slightly crunchy texture, roll each ball in extra sugar.
  • Place the dough balls onto the prepared cookie sheet about 2 inches apart.
  • Bake in the preheated oven for 9-12 minutes, or until the edges are lightly golden.

Step 4: Create the Bear Paw Design

  • Remove from the oven and immediately press one Ghiradelli dark chocolate melting wafer into the center of each cookie to create the paw pad.
  • Place 3 semi-sweet chocolate chips above the wafer to resemble claws on each cookie.

Step 5: Cool and Enjoy

  • Allow the cookies to cool on the baking sheet for 5 minutes, then transfer them to a wire rack to cool completely.
  • Once cooled, enjoy these adorable Bear Paw Cookies with a glass of milk or your favorite hot beverage!


Prep Time: 10 minutes | Cooking Time: 9-12 minutes | Total Time: 19 minutes | Servings: 24 cookies

Notes

After baking up a batch of these charming Bear Paw Cookies, here are some useful tips to ensure they are served and stored perfectly:

Serving Tips:

  1. Freshness: Bear Paw Cookies are best enjoyed fresh out of the oven when the chocolate is still slightly melted. Serve them warm for a gooey, delightful treat.
  2. Accompaniments: Pair these cookies with a cold glass of milk, hot cocoa, or your favorite coffee. The combination of chocolate and buttery cookie will be perfectly complemented by a beverage.
  3. Presentation: Arrange the cookies on a decorative platter or serve them in individual paper liners for a whimsical touch, especially at parties or gatherings.
  4. Variety: Experiment with different types of chocolate for the paw pads and claws to add visual appeal and flavor variety. White chocolate or milk chocolate wafers can also be used.

Storage Tips:


  1. Room Temperature: Store Bear Paw Cookies in an airtight container at room temperature for up to 3-4 days. Ensure the container is tightly sealed to maintain freshness and prevent them from drying out.
  2. Reheating: If cookies lose their softness, you can reheat them in the microwave for a few seconds to restore their warm, gooey texture.
  3. Freezing: These cookies freeze well. Place them in a single layer in a freezer-safe container or zip-top bag with parchment paper between layers to prevent sticking. They can be frozen for up to 2-3 months.
  4. Thawing: When ready to enjoy frozen Bear Paw Cookies, thaw them at room temperature or in the refrigerator. You can also reheat them in the oven at a low temperature to freshen them up.
  5. Layering: If stacking cookies for storage, place a sheet of parchment paper between layers to prevent them from sticking together and preserve their appearance.